> ## Documentation Index
> Fetch the complete documentation index at: https://covalenthq.com/docs/llms.txt
> Use this file to discover all available pages before exploring further.
# Setup BRP Node
### Prerequisites for Validator & Operator nodes
1. **Staking Address:** This is the address of the wallet holding your CXT on Ethereum mainnet.
2. **Operator Address:** This is a public address tied to the private-public key pair an operator will use to sign proof transactions to the proof-chain contract on moonbeam.
* Please provide the public address to this pair to Covalent. Keep the private key secret and safe. **Please make sure that the Staking address and Operator Address are separate**.
```shell theme={null}
It can be generated using the BIP-44 mnemonic multi-account deterministic algorithm. It can be generated using https://iancoleman.io/bip39/ (select 24 words, Coin: ETH).
```
Min 35,000 CXT & Max 70,000 CXT on Ethereum mainnet.
**In order to send proofs of block specimens.** This costs approximately 5 GLMR per day. This should be held at the same address as the Operator Address.
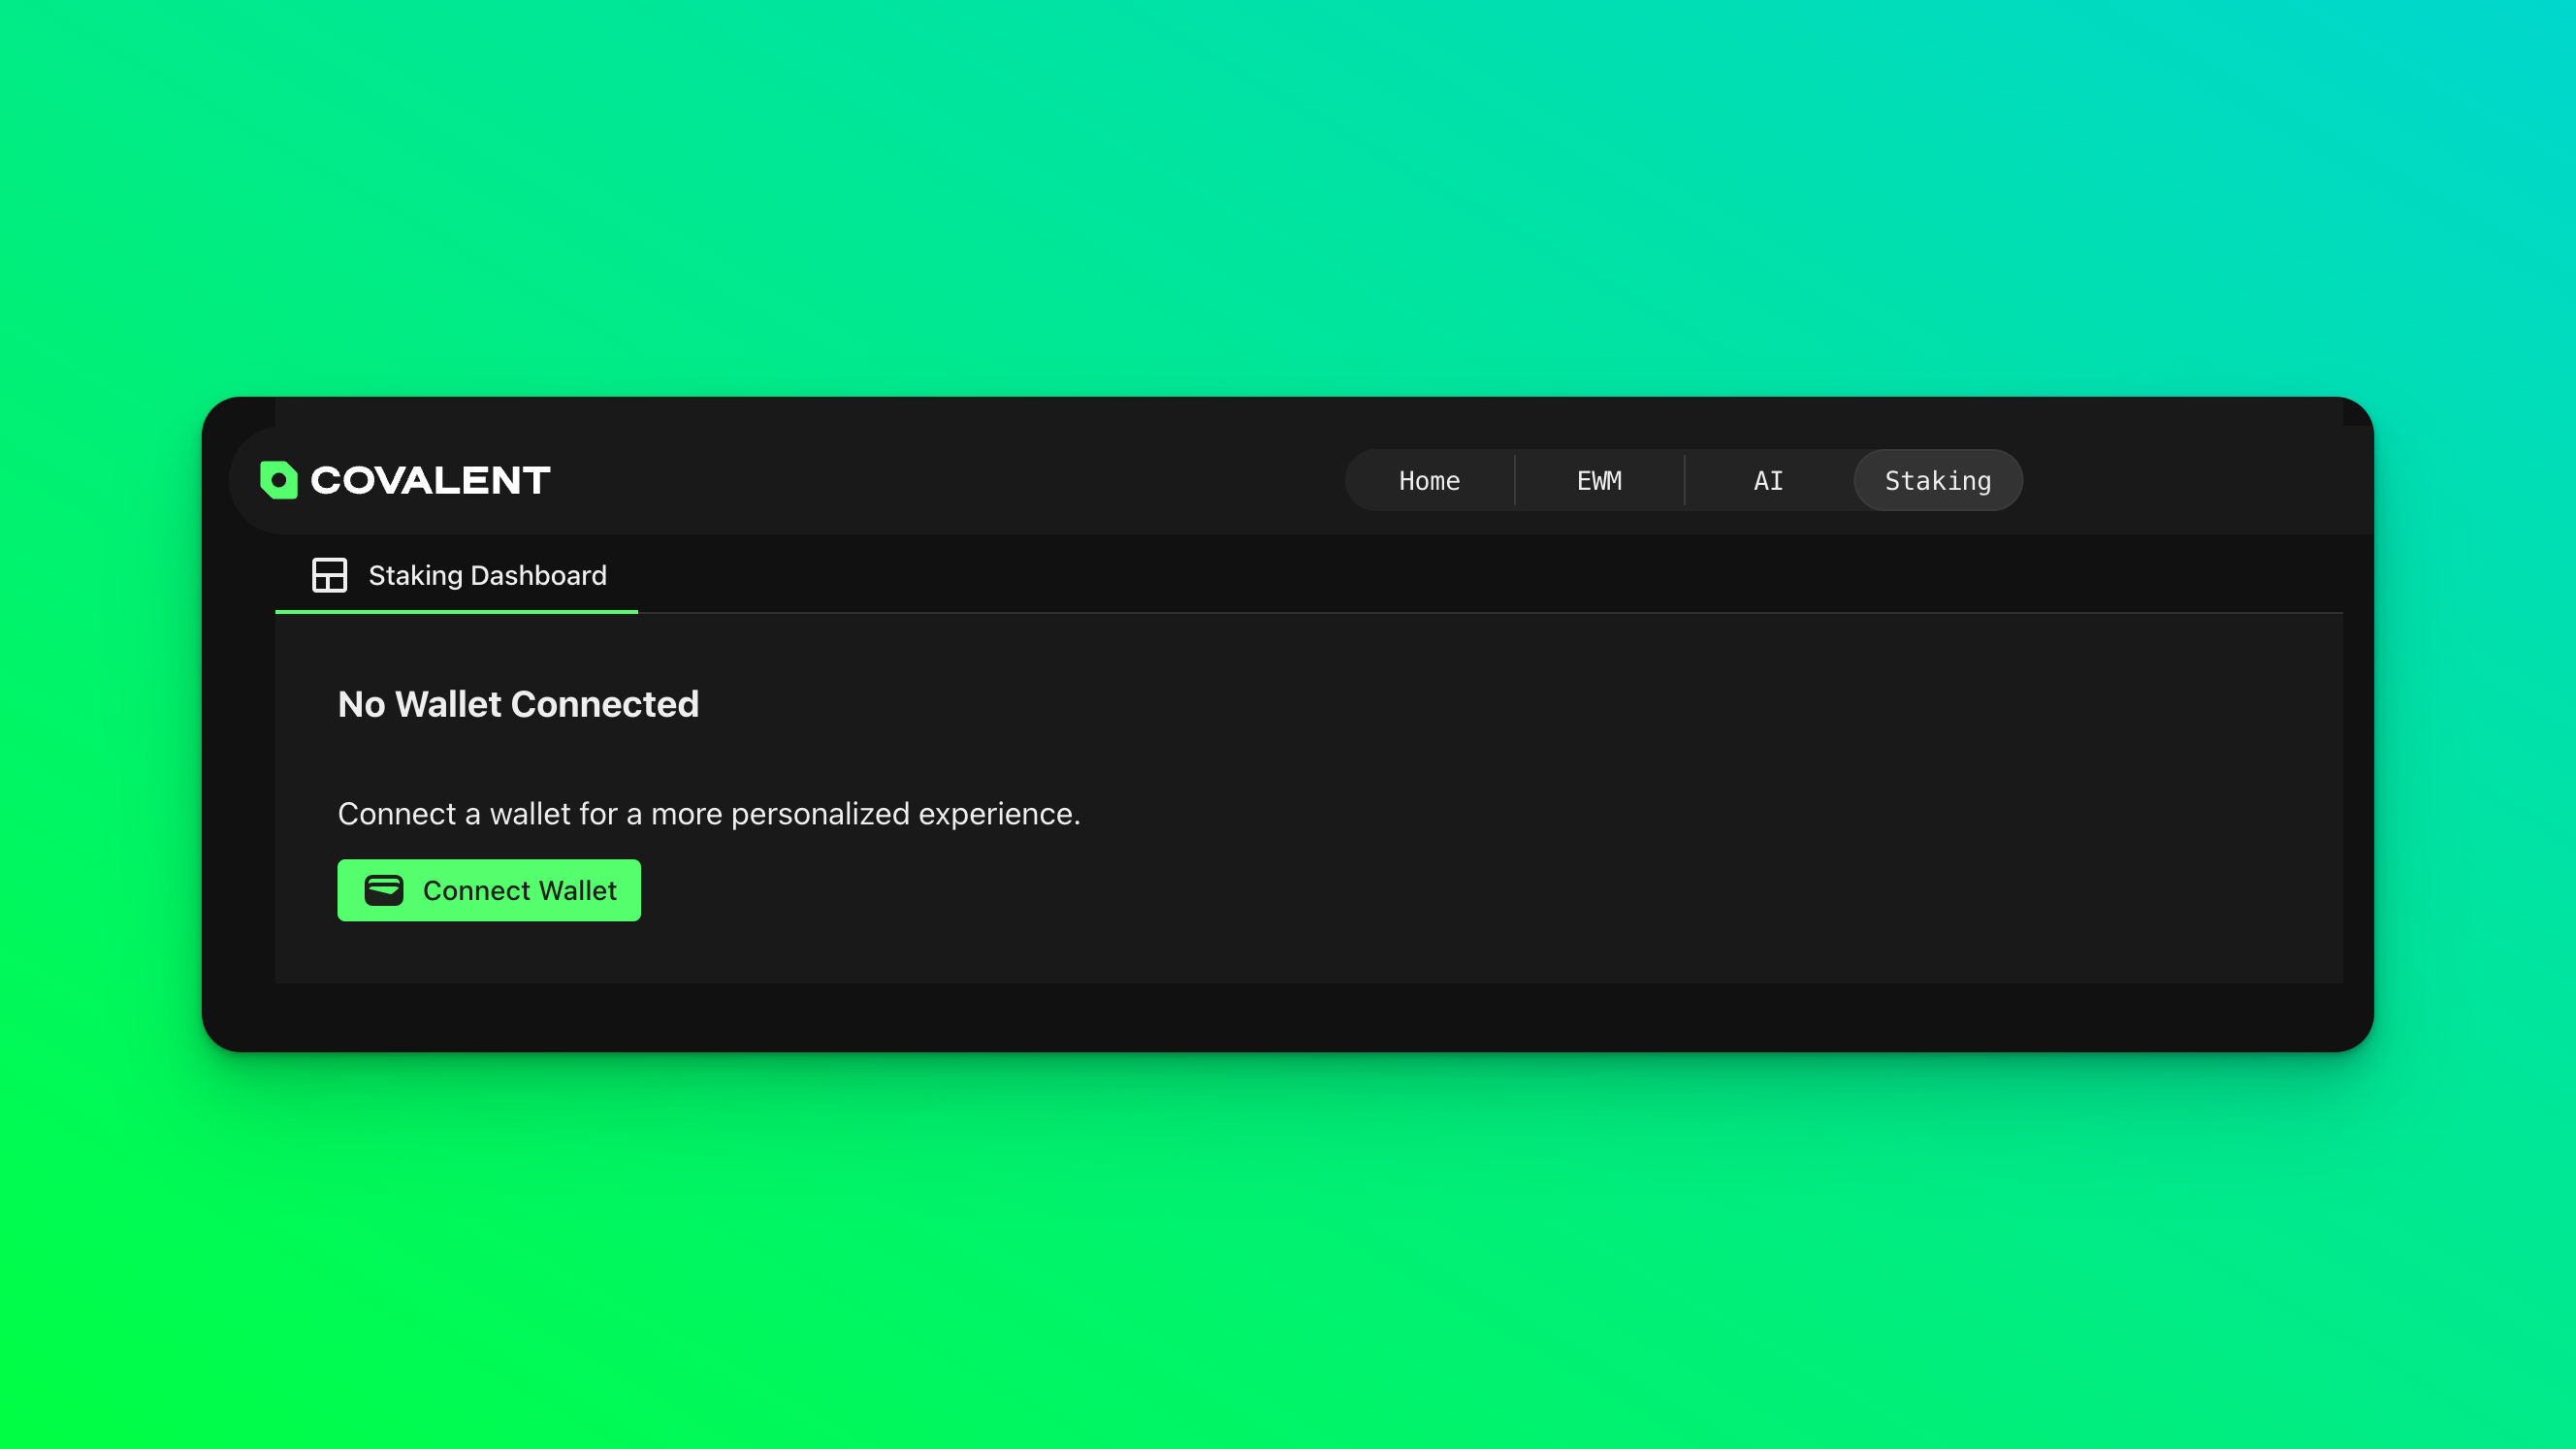
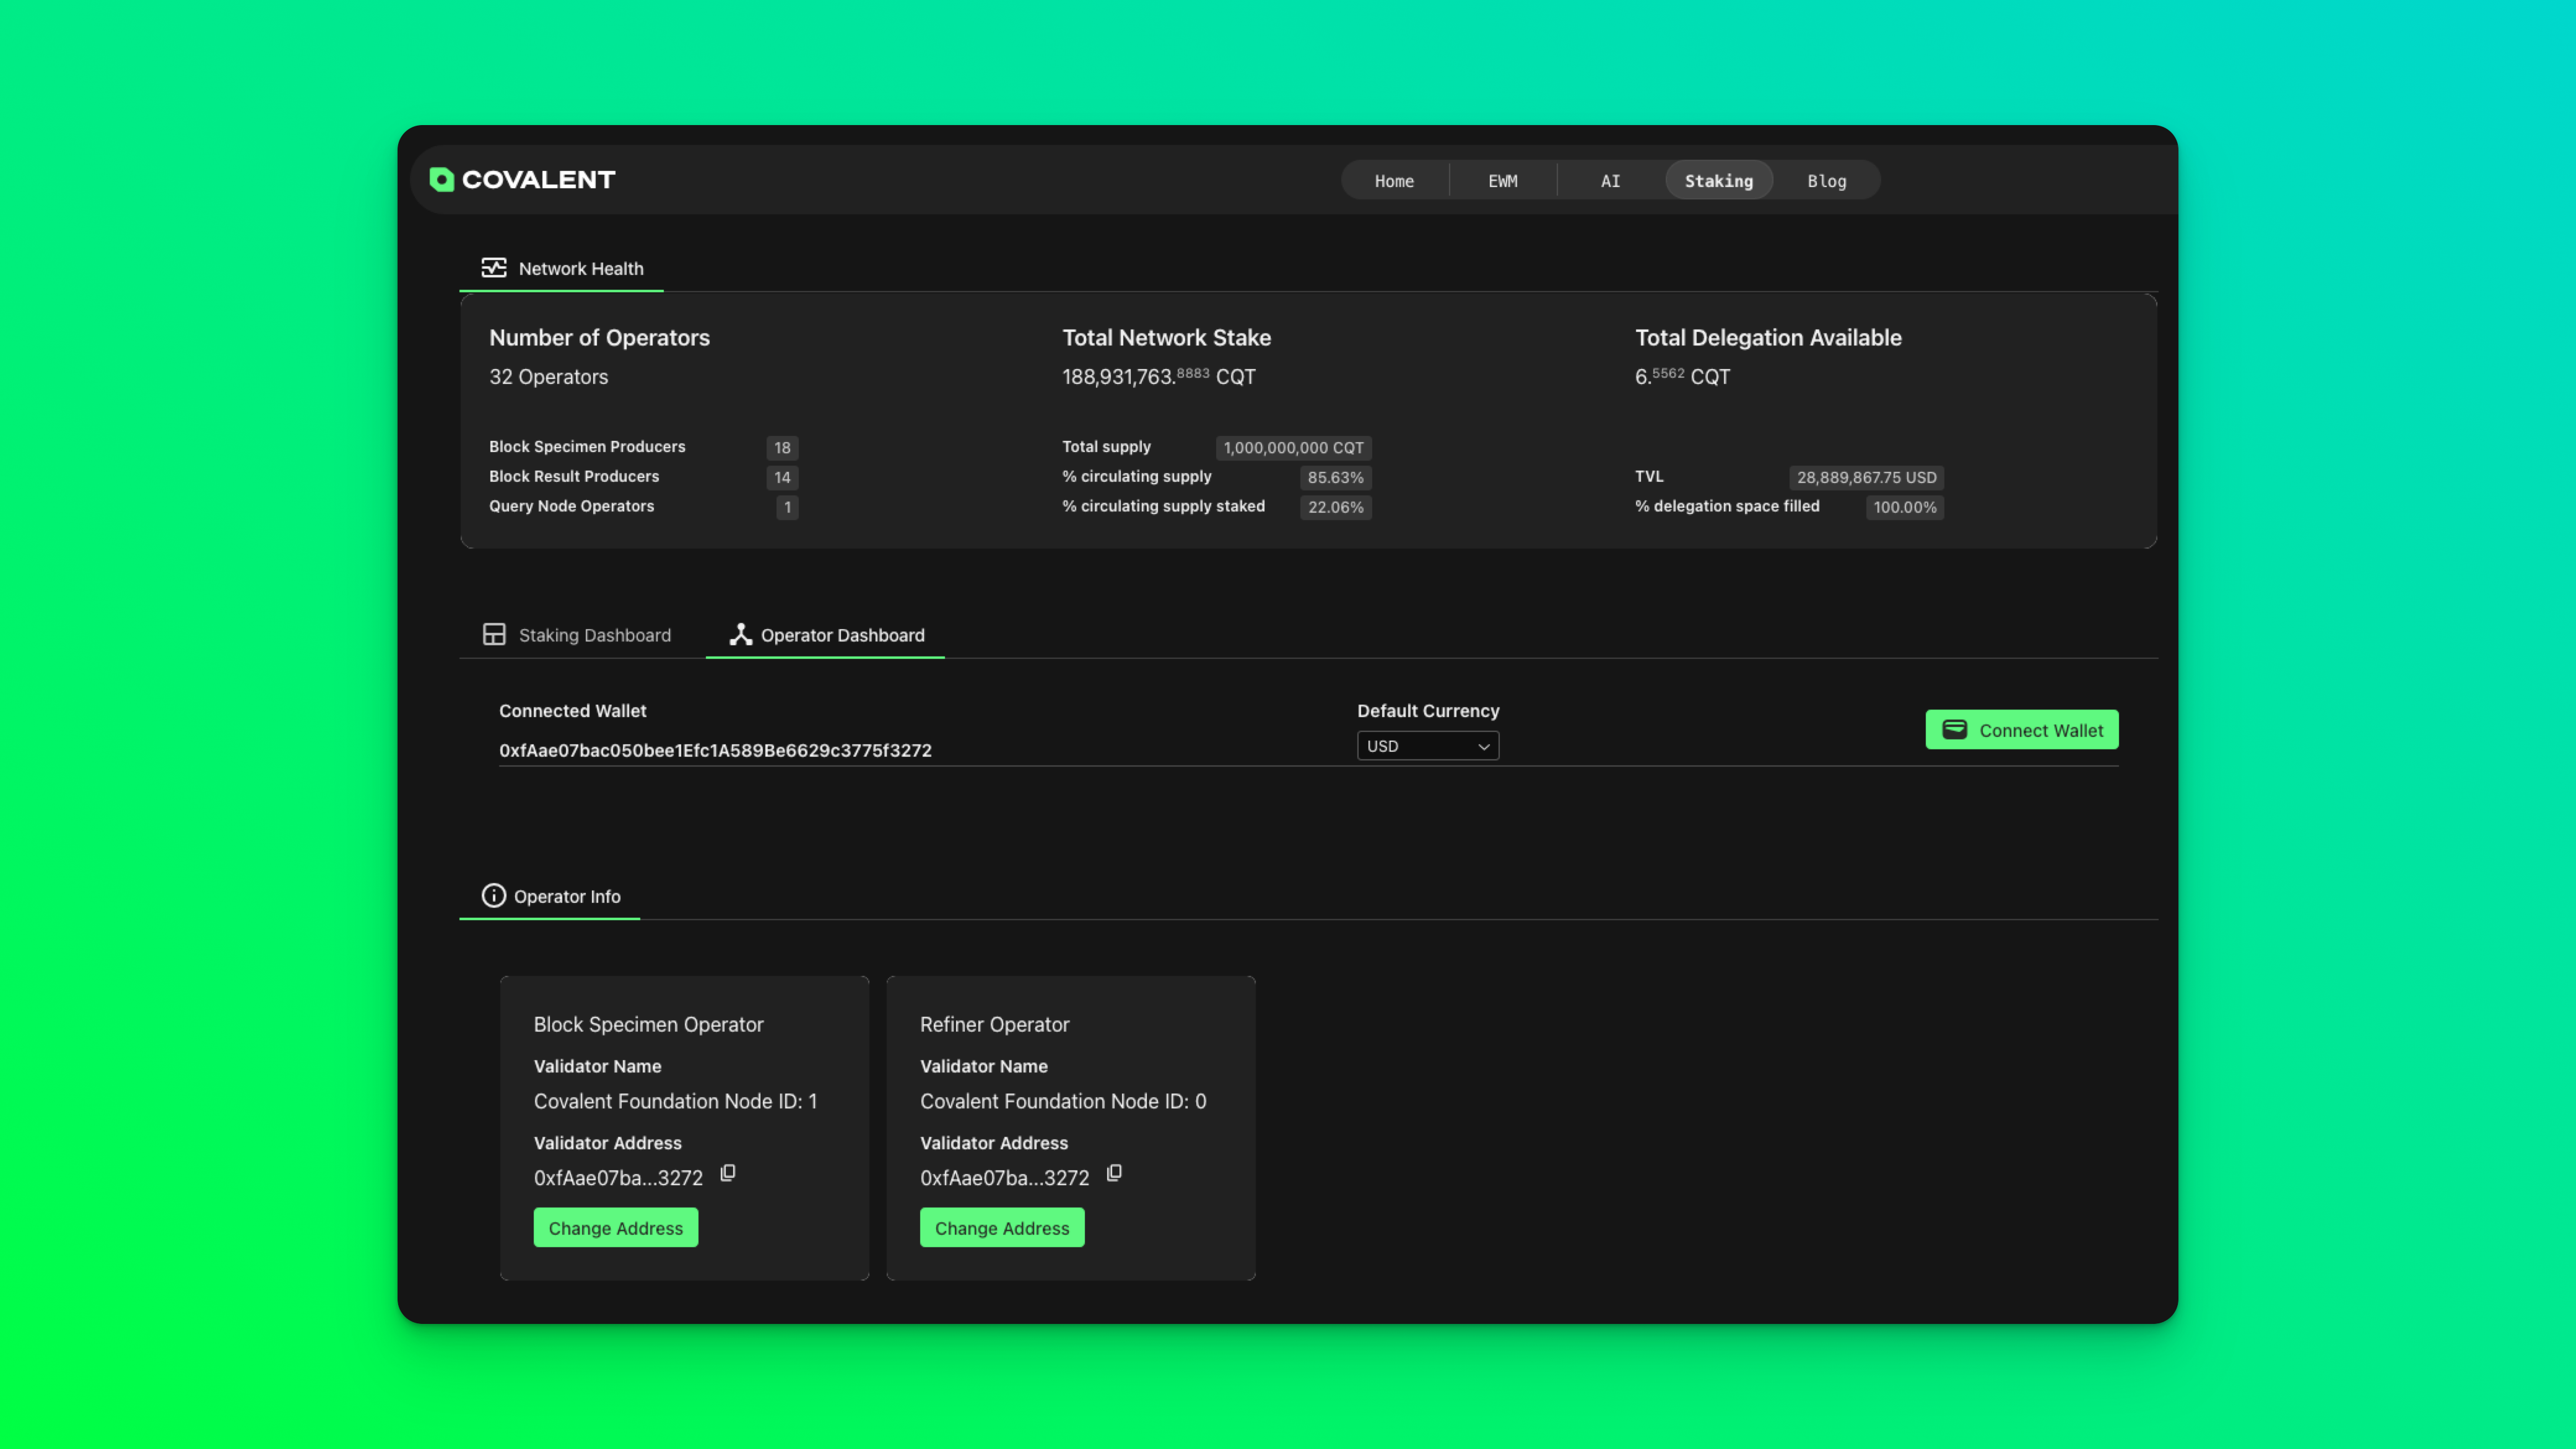
Import your Validator private key into Metamask, select the Ethereum mainnet network and connect your **Staking wallet** to the [operator dashboard](https://www.covalenthq.com/staking/#/operator-dashboard/).Your operator should be currently disabled.
 Self-Stake the Minimum CXT Staking requirement on Ethereum (35,000 CXT) for BRP. This is done using the **Change Stake** button in your [operator dashboard](https://www.covalenthq.com/staking/#/operator-dashboard/). Proceed to first set Stake Amount to 35000 and click **Approve**.
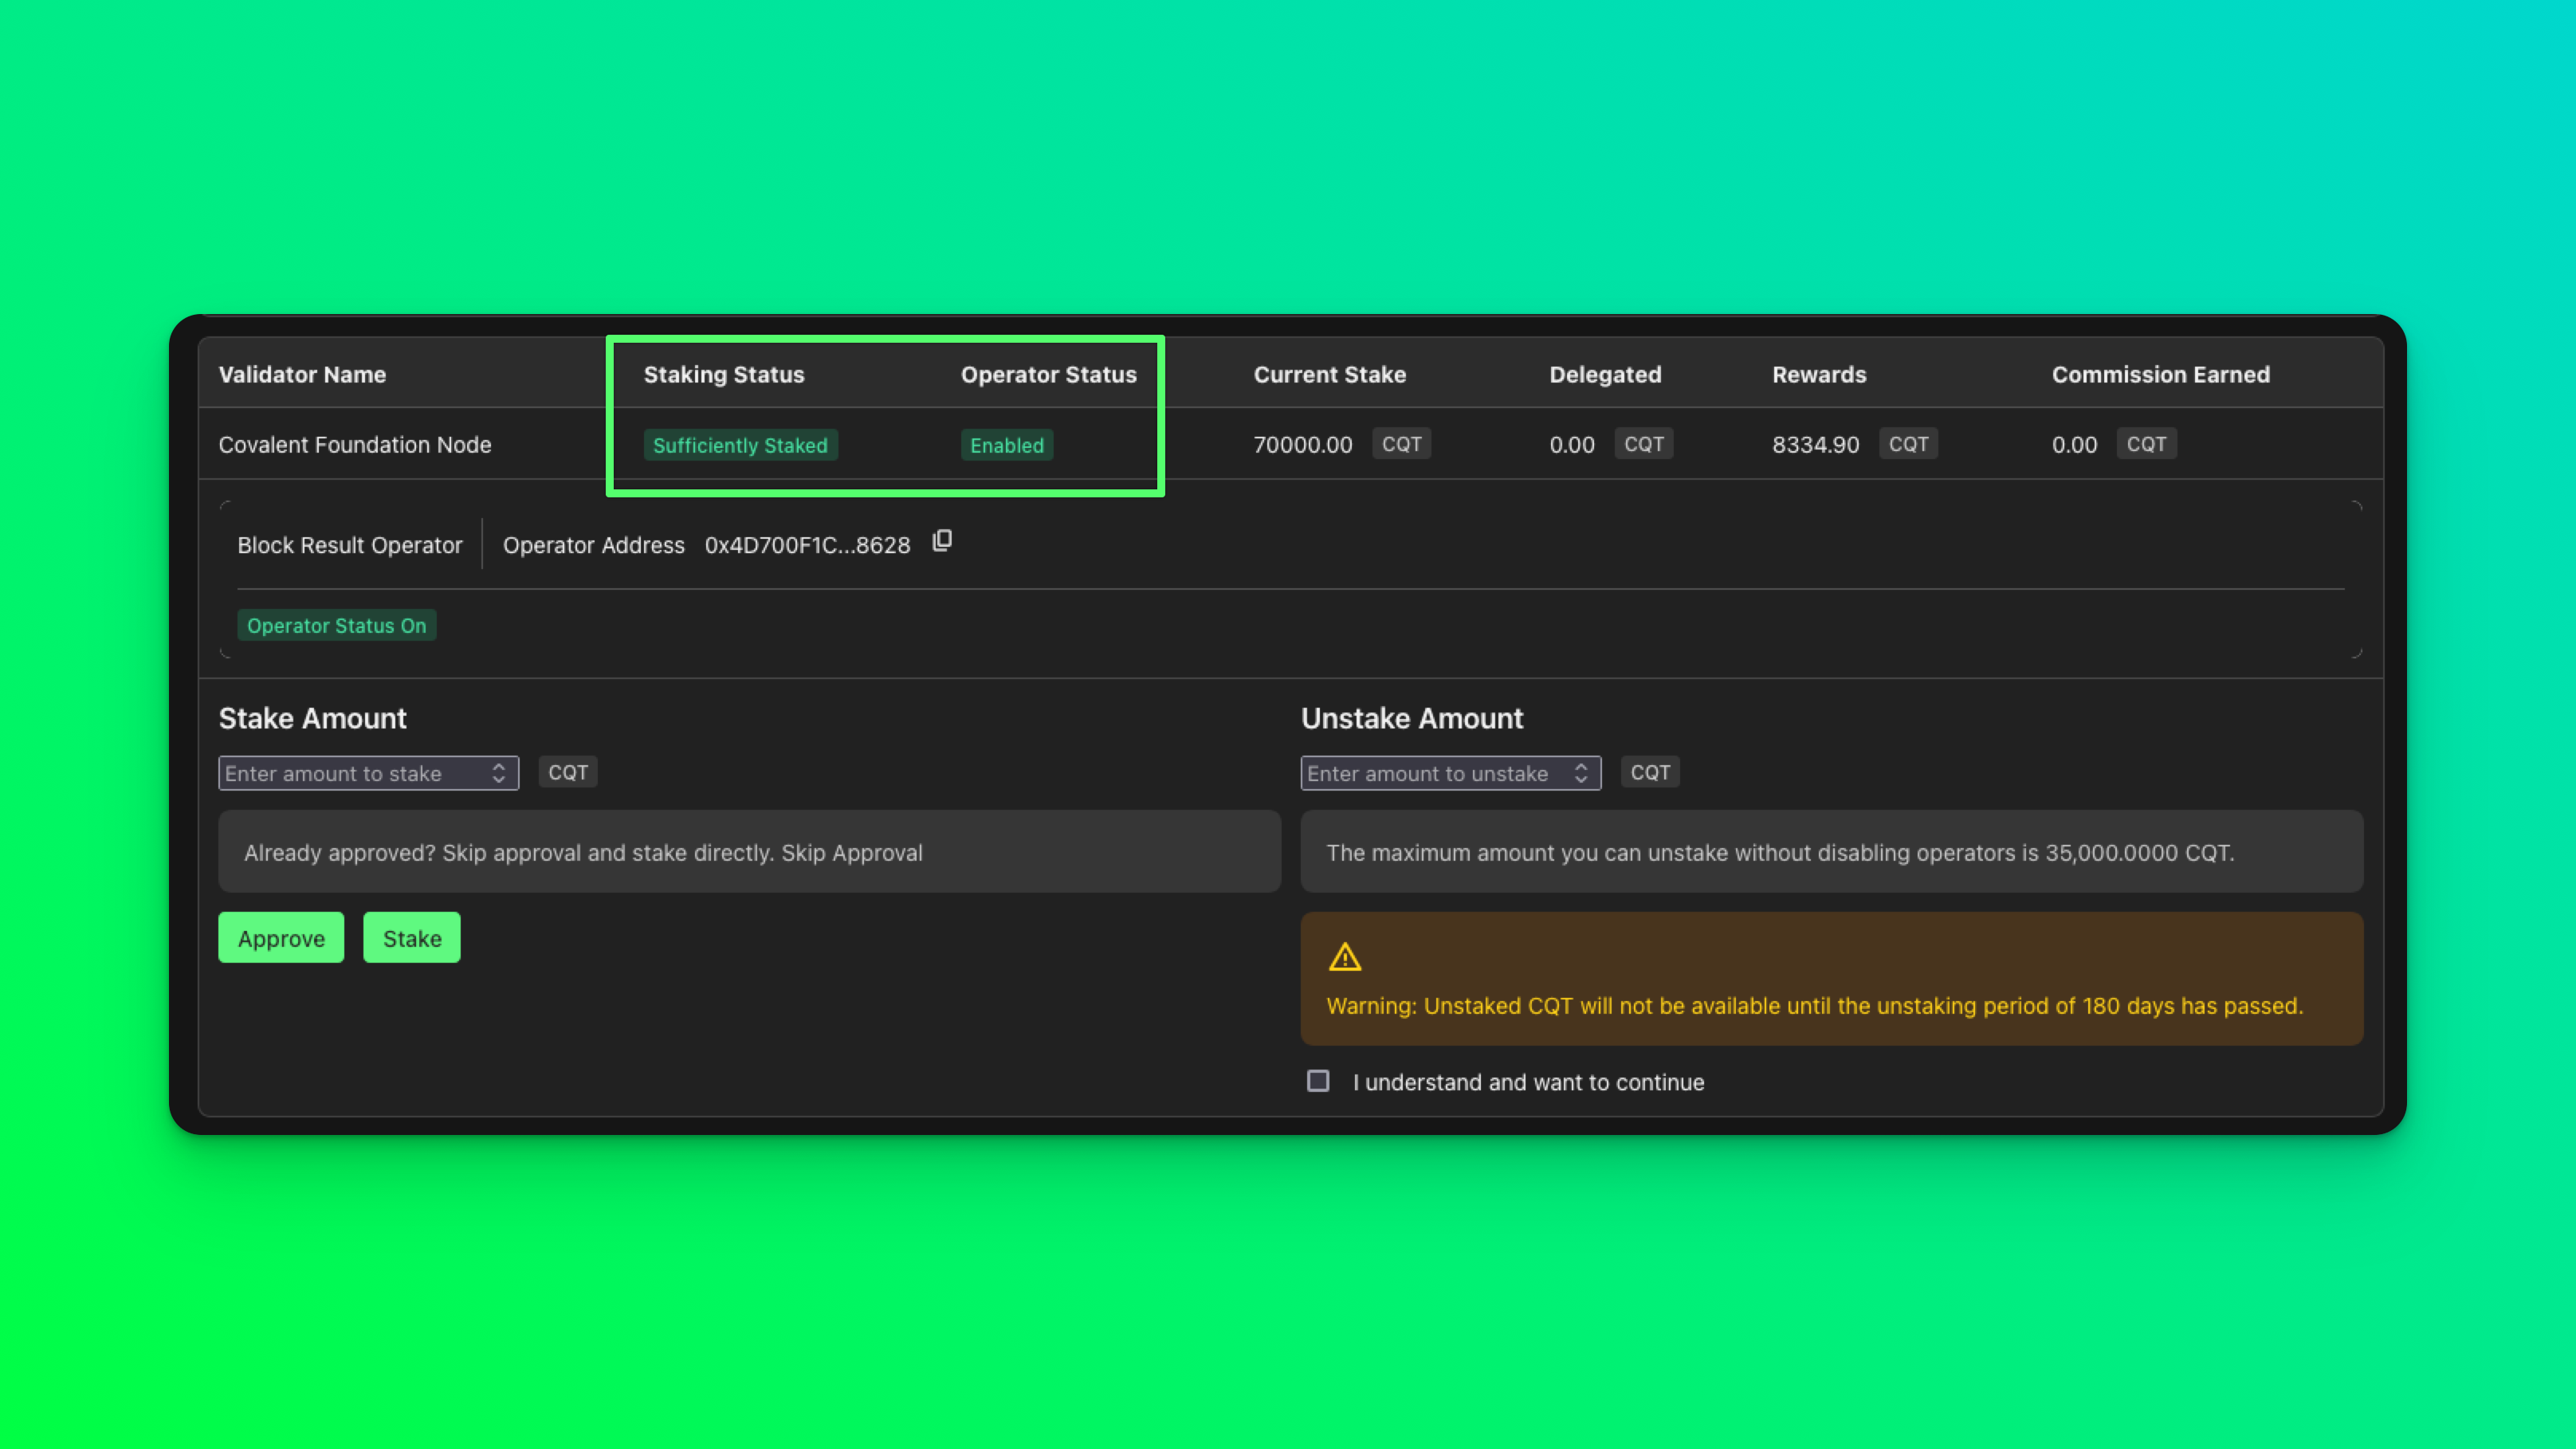
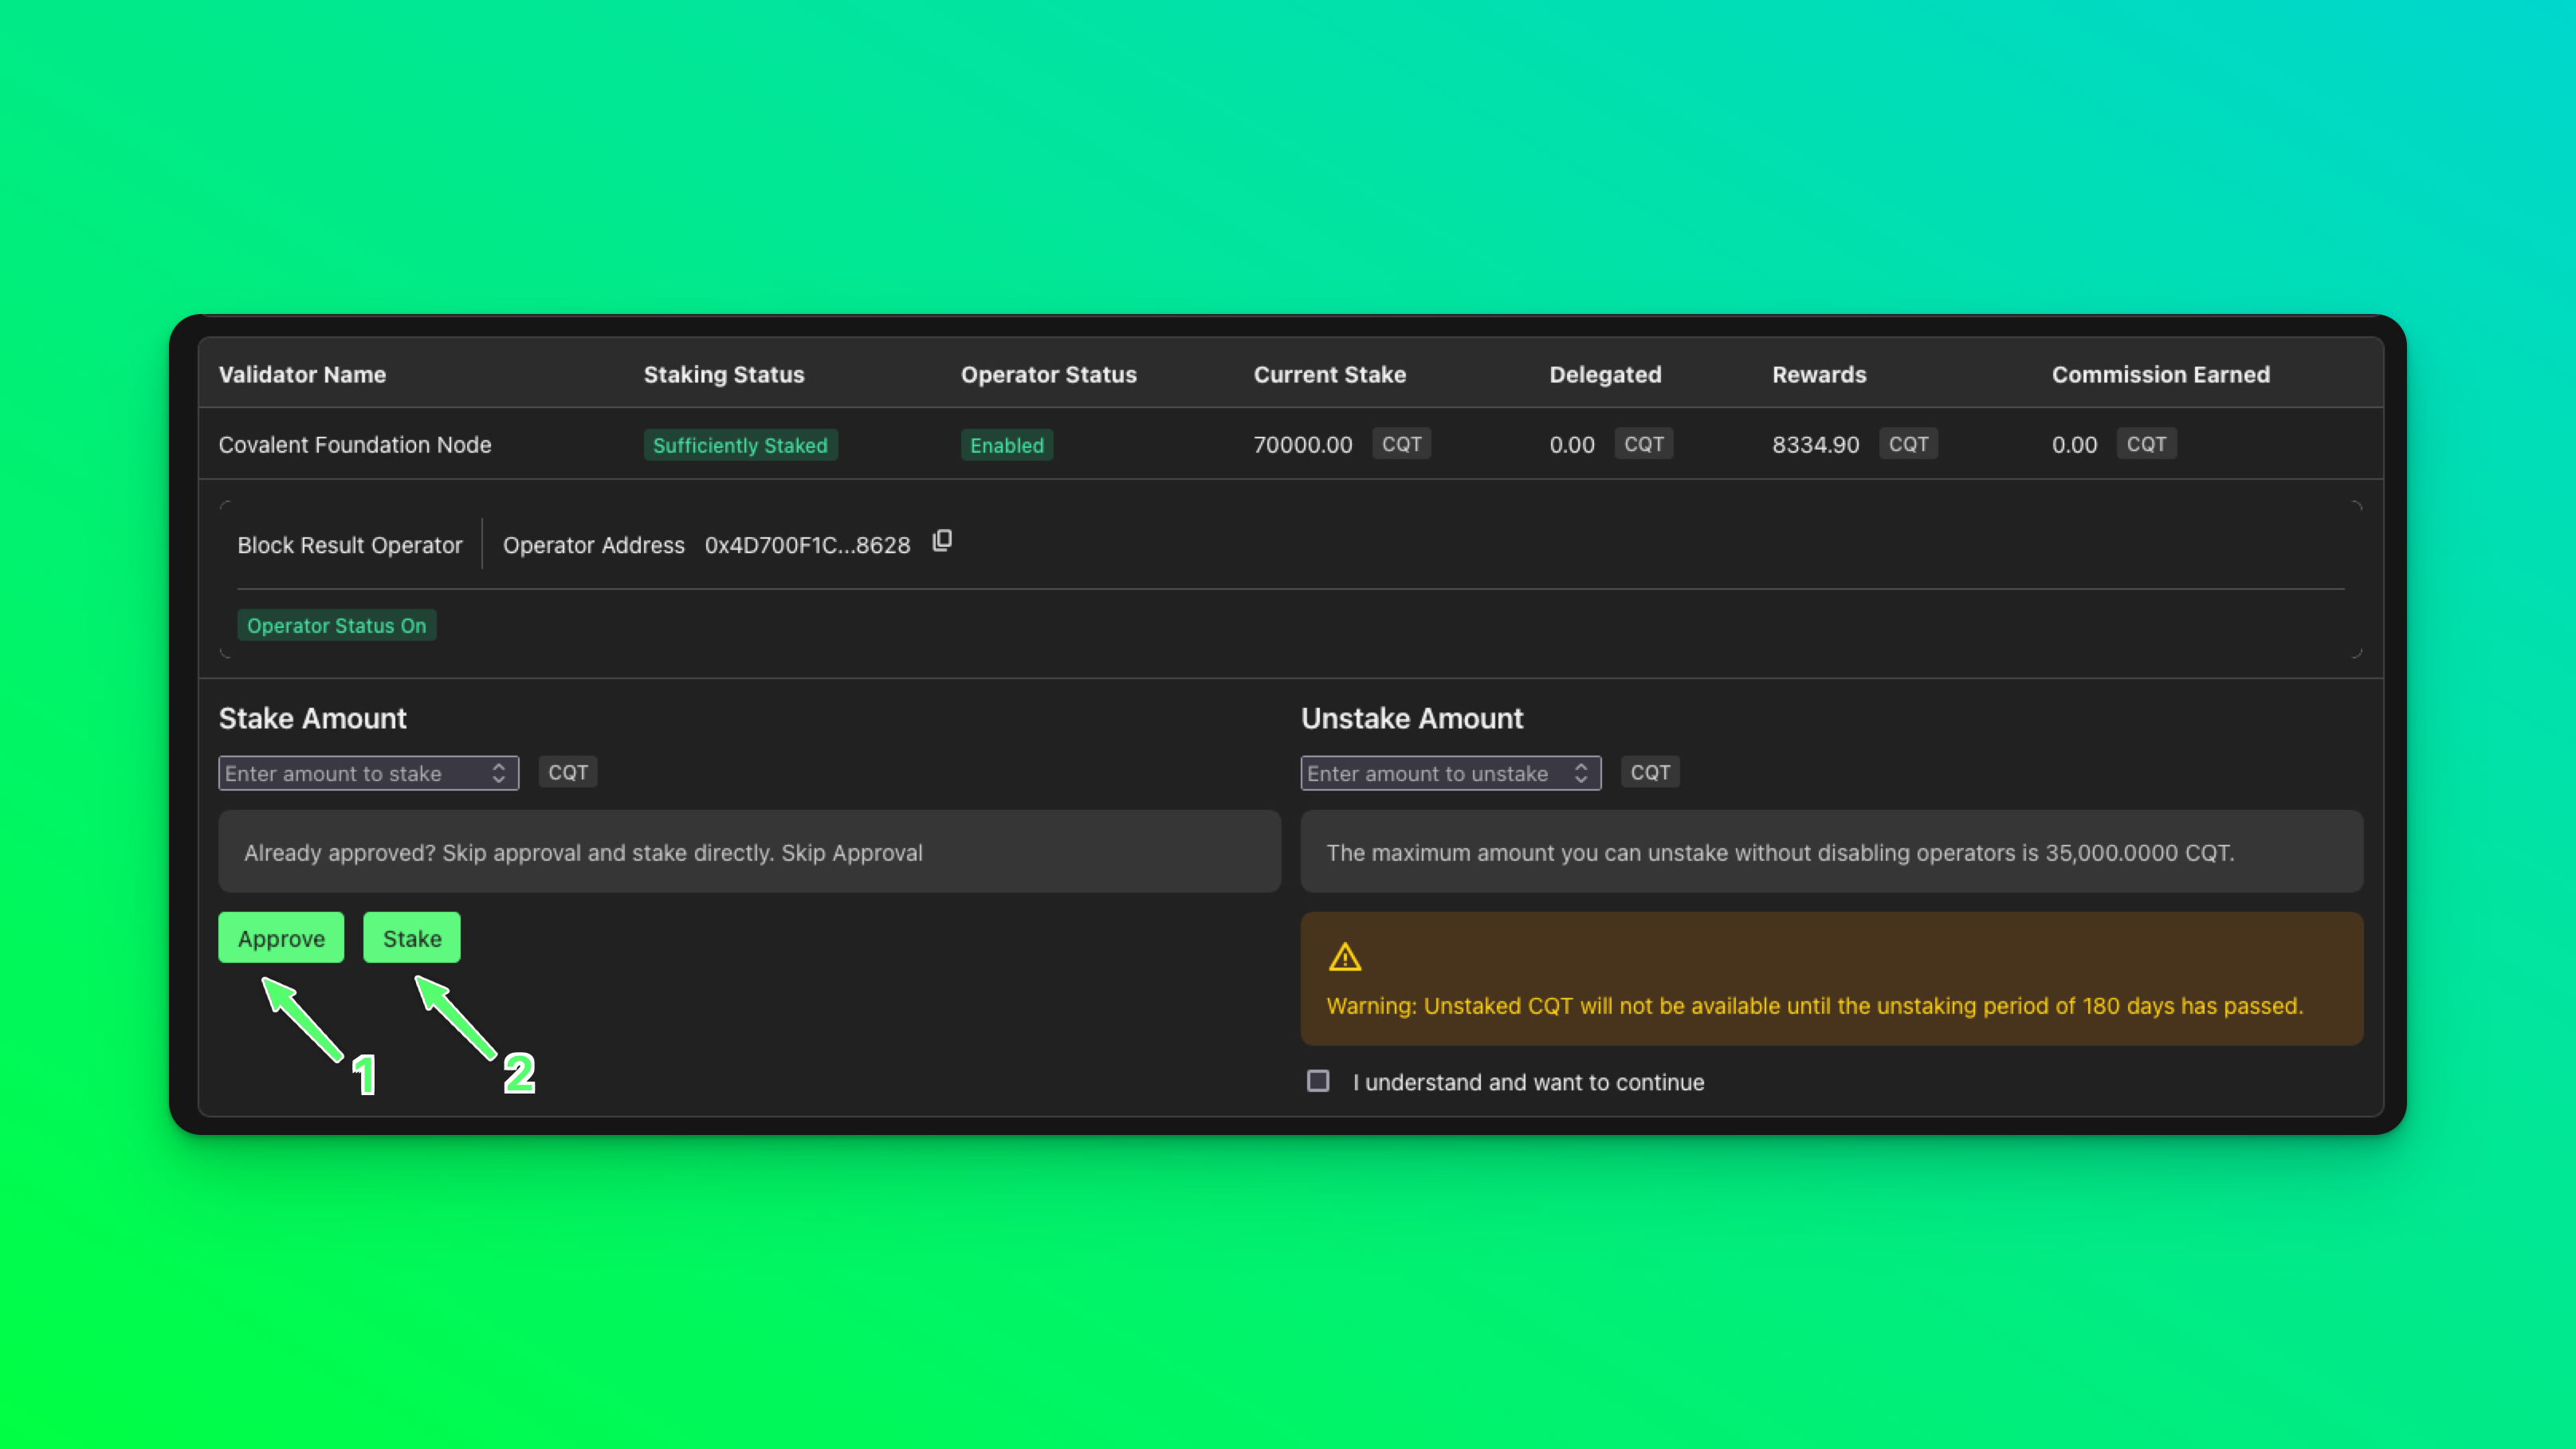 After the on chain approval transaction completes, click on **Stake**. Once the staking transaction completes, your Staking Status should display **Sufficiently Staked** and **Enabled**.
 Get access to a reliable Moonbeam https RPC. Providers and RPC URLs can be found [here](https://docs.moonbeam.network/builders/get-started/endpoints/#endpoint-providers) . Ping the Covalent team on discord for recommendations.
Validators can create a [web3.storage](https://web3.storage/) account and have `did key`, `W3-agent-key` and `proof.out` for `das-pinner` file or can reach out to covalent team on discord for these details.
### Install Dependencies:
As we discussed in previous section, We can setup the nodes two ways so here in this section, you can follow dependencies accordingly:
* **Run with Docker Compose** (Recommended method - Beginner)
* **Build & Run from Source** (Optional method - Advanced)
### Dependencies to Run with Docker Compose:
1. Install Docker
Follow the [docker install instructions](https://docs.docker.com/engine/install) for your platform/architecture.
Onboarding instructions will be [based on Ubuntu 22.04 LTS x86\_64 / amd64](https://docs.docker.com/engine/install/ubuntu/)
2. Install `direnv`
#### Debian/Ubuntu
```shell bash theme={null}
sudo apt update
sudo apt get direnv
# bash users - add the following line to your ~/.bashrc
eval "$(direnv hook bash)"
source ~/.bashrc
```
```shell zsh theme={null}
sudo apt update
sudo apt get direnv
# zsh users - add the following line to your ~/.zshrc
eval "$(direnv hook zsh)"
source ~/.zshrc
```
#### MacOS 12.x (M1/Intel)
```shell theme={null}
brew install direnv
```
### Dependencies to Run with Source:
#### Prerequisites
**MacOS 12.x (M1/Intel) Installation requirements**
Install XCode (skip if you already have xcode and have been developing on your mac)
```shell theme={null}
xcode-select --install
sudo xcodebuild -license
agree
```
You must also Install brew (for mac m1/intel) with this [script](https://raw.githubusercontent.com/Homebrew/install/HEAD/install.sh). This installs all the minimum necessary terminal/command-line tools to get started with easy software development on a mac.
**Installation Time:** 35-40 mins depending on your machine and network.
Install `git`, `go`, `asdf`, `erlang`, `elixir`, `direnv`, `go-ipfs`
* Git is used as the source code version control manager across all our repositories.
* Go is the programming language that is used to develop on go-ethereum, bsp-agent, erigon (EVM plugin) all which are entirely written in go.
* Asdf is a CLI tool that can manage multiple language runtime versions on a per-project basis.
* Erlang is a programming language used to build massively scalable soft real-time systems with requirements on high availability.
* Elixir is a programming language that runs on the Erlang VM, known for creating low-latency, distributed, high concurrency fault-tolerant systems.
* IPFS as the InterPlanetary File System (IPFS) is a protocol, hypermedia and file sharing peer-to-peer network for storing and sharing data in a distributed file system.
* Direnv is used for secret management and control. Since all the necessary parameters to the agent that are sensitive cannot be passed into a command line flag. Direnv allows for safe and easy management of secrets like ethereum private keys for the operator accounts on the Covalent Network and redis instance access passwords etc. As these applications are exposed to the internet on http ports it’s essential to not have the information be logged anywhere. To enable “direnv” on your machine add these to your \~./bash\_profile or \~./zshrc depending on which you use as your default shell after installing it using brew.
Here, are the commands that can be used to install the dependencies select based on your OS accordingly
#### MacOS 12.x (M1/Intel) Install dependencies
```shell theme={null}
/bin/bash -c "$(curl -fsSL https://raw.githubusercontent.com/Homebrew/install/HEAD/install.sh)"
brew install coreutils curl git wget direnv asdf
```
For setting up asdf on other shells please refer to [this guide.](https://asdf-vm.com/guide/getting-started.html)
#### Linux x86\_64 (Ubuntu 22.04 LTS) Install dependencies
```shell theme={null}
sudo apt update
sudo apt install build-essential coreutils libssl-dev automake autoconf libncurses5-dev curl git wget direnv unzip
git clone https://github.com/asdf-vm/asdf.git ~/.asdf --branch v0.11.2
echo ". $HOME/.asdf/asdf.sh" >> ~/.bashrc
echo ". $HOME/.asdf/completions/asdf.bash" >> ~/.bashrc
source ~/.bashrc
```
```shell theme={null}
asdf plugin add erlang https://github.com/asdf-vm/asdf-erlang.git
asdf plugin add elixir https://github.com/asdf-vm/asdf-elixir.git
asdf plugin add golang https://github.com/kennyp/asdf-golang.git
```
Add to your bash shell for asdf for any other shell, check [the asdf guide.](https://asdf-vm.com/guide/getting-started.html)
```shell theme={null}
echo -e "\n. \"$(brew --prefix asdf)/etc/bash_completion.d/asdf.bash\"" >> ~/.bash_profile
```
```shell theme={null}
asdf install erlang 25.3
asdf install elixir 1.14.3-otp-24
asdf install golang 1.22.5
```
This will create a
`.tool-versions`
Get access to a reliable Moonbeam https RPC. Providers and RPC URLs can be found [here](https://docs.moonbeam.network/builders/get-started/endpoints/#endpoint-providers) . Ping the Covalent team on discord for recommendations.
Validators can create a [web3.storage](https://web3.storage/) account and have `did key`, `W3-agent-key` and `proof.out` for `das-pinner` file or can reach out to covalent team on discord for these details.
### Install Dependencies:
As we discussed in previous section, We can setup the nodes two ways so here in this section, you can follow dependencies accordingly:
* **Run with Docker Compose** (Recommended method - Beginner)
* **Build & Run from Source** (Optional method - Advanced)
### Dependencies to Run with Docker Compose:
1. Install Docker
Follow the [docker install instructions](https://docs.docker.com/engine/install) for your platform/architecture.
Onboarding instructions will be [based on Ubuntu 22.04 LTS x86\_64 / amd64](https://docs.docker.com/engine/install/ubuntu/)
2. Install `direnv`
#### Debian/Ubuntu
```shell bash theme={null}
sudo apt update
sudo apt get direnv
# bash users - add the following line to your ~/.bashrc
eval "$(direnv hook bash)"
source ~/.bashrc
```
```shell zsh theme={null}
sudo apt update
sudo apt get direnv
# zsh users - add the following line to your ~/.zshrc
eval "$(direnv hook zsh)"
source ~/.zshrc
```
#### MacOS 12.x (M1/Intel)
```shell theme={null}
brew install direnv
```
### Dependencies to Run with Source:
#### Prerequisites
**MacOS 12.x (M1/Intel) Installation requirements**
Install XCode (skip if you already have xcode and have been developing on your mac)
```shell theme={null}
xcode-select --install
sudo xcodebuild -license
agree
```
You must also Install brew (for mac m1/intel) with this [script](https://raw.githubusercontent.com/Homebrew/install/HEAD/install.sh). This installs all the minimum necessary terminal/command-line tools to get started with easy software development on a mac.
**Installation Time:** 35-40 mins depending on your machine and network.
Install `git`, `go`, `asdf`, `erlang`, `elixir`, `direnv`, `go-ipfs`
* Git is used as the source code version control manager across all our repositories.
* Go is the programming language that is used to develop on go-ethereum, bsp-agent, erigon (EVM plugin) all which are entirely written in go.
* Asdf is a CLI tool that can manage multiple language runtime versions on a per-project basis.
* Erlang is a programming language used to build massively scalable soft real-time systems with requirements on high availability.
* Elixir is a programming language that runs on the Erlang VM, known for creating low-latency, distributed, high concurrency fault-tolerant systems.
* IPFS as the InterPlanetary File System (IPFS) is a protocol, hypermedia and file sharing peer-to-peer network for storing and sharing data in a distributed file system.
* Direnv is used for secret management and control. Since all the necessary parameters to the agent that are sensitive cannot be passed into a command line flag. Direnv allows for safe and easy management of secrets like ethereum private keys for the operator accounts on the Covalent Network and redis instance access passwords etc. As these applications are exposed to the internet on http ports it’s essential to not have the information be logged anywhere. To enable “direnv” on your machine add these to your \~./bash\_profile or \~./zshrc depending on which you use as your default shell after installing it using brew.
Here, are the commands that can be used to install the dependencies select based on your OS accordingly
#### MacOS 12.x (M1/Intel) Install dependencies
```shell theme={null}
/bin/bash -c "$(curl -fsSL https://raw.githubusercontent.com/Homebrew/install/HEAD/install.sh)"
brew install coreutils curl git wget direnv asdf
```
For setting up asdf on other shells please refer to [this guide.](https://asdf-vm.com/guide/getting-started.html)
#### Linux x86\_64 (Ubuntu 22.04 LTS) Install dependencies
```shell theme={null}
sudo apt update
sudo apt install build-essential coreutils libssl-dev automake autoconf libncurses5-dev curl git wget direnv unzip
git clone https://github.com/asdf-vm/asdf.git ~/.asdf --branch v0.11.2
echo ". $HOME/.asdf/asdf.sh" >> ~/.bashrc
echo ". $HOME/.asdf/completions/asdf.bash" >> ~/.bashrc
source ~/.bashrc
```
```shell theme={null}
asdf plugin add erlang https://github.com/asdf-vm/asdf-erlang.git
asdf plugin add elixir https://github.com/asdf-vm/asdf-elixir.git
asdf plugin add golang https://github.com/kennyp/asdf-golang.git
```
Add to your bash shell for asdf for any other shell, check [the asdf guide.](https://asdf-vm.com/guide/getting-started.html)
```shell theme={null}
echo -e "\n. \"$(brew --prefix asdf)/etc/bash_completion.d/asdf.bash\"" >> ~/.bash_profile
```
```shell theme={null}
asdf install erlang 25.3
asdf install elixir 1.14.3-otp-24
asdf install golang 1.22.5
```
This will create a
`.tool-versions`
file in your home directory. ASDF will use these versions whenever a project doesn't specify versions of its own.
```shell theme={null}
asdf global erlang 25.3
asdf global elixir 1.14.3-otp-24
asdf global golang 1.22.5
```
```shell bash theme={null}
#bash users - add the following line to your ~/.bashrc
eval "$(direnv hook bash)"
```
```shell zsh theme={null}
#zsh users - add the following line to your ~/.zshrc
eval "$(direnv hook zsh)"
```
After adding this line do not forget to source your bash / powershell config with the following, by running it in your terminal
```shell bash theme={null}
source ~/.bashrc
```
```shell zsh theme={null}
source ~/.zshrc
```
**MacOS 12.x (M1/Intel)**
```shell theme={null}
wget https://dist.ipfs.tech/go-ipfs/v0.18.0/go-ipfs_v0.18.0_darwin-arm64.tar.gz
tar -xzvf go-ipfs_v0.18.0_darwin-arm64.tar.gz
cd go-ipfs
bash install.sh
ipfs init
```
```shell theme={null}
wget https://dist.ipfs.tech/go-ipfs/v0.18.0/go-ipfs_v0.18.0_linux-amd64.tar.gz
tar -xzvf go-ipfs_v0.18.0_darwin-arm64.tar.gz
cd go-ipfs
bash install.sh
ipfs init
```
**Note:** To avoid permissions and netscan issues execute the following against ipfs binary home directory application
```shell theme={null}
sudo chmod -R 700 ~/.ipfs
ipfs config profile apply server
```