Building NFT Analytics Using Covalent's NFT API and GoldRush Components
In the blockchain ecosystem, non-fungible tokens (NFTs) will always remain a groundbreaking innovation that has revolutionised the way we perceive and exchange digital assets. These unique tokens, which are mostly used to represent things like digital art, collectibles, and virtual real estate, have gained an incredible amount of attention in recent years, and as the NFT ecosystem continues to flourish, enthusiasts and investors are looking for ways to gain deeper insight into all the data that surrounds NFTs.
Imagine knowing when Bored Ape (BAYC) or CryptoPunk is about to blow up or seeing their price rise and fall on a clear dashboard. This is where an NFT analytics application is useful, and here is also where Covalent’s NFT API comes in handy. The Covalent NFT API is a powerful API (application programming interface) built to unravel the complexities of NFT transactions, sale history, and price movement data.
In this article, we will be building an NFT analytics tool that will explore the NFTs in a wallet across multiple chains and also track the price movement and sales history of NFTs in a particular collection using Covalent's NFT API and GoldRush components. So, without any further ado, let’s get into action.
NFT Analytics Tool
The NFT analytics application is built using GoldRush Kit: customizable React components that use the Covalent API under the hood. The application is focused on exploring the NFTs held by a given wallet address and also the NFTs that make up an NFT collection. It uses one input field to receive an address, but the application under the hood can detect if an address is an EOA (Externally Owned Account) like a conventional wallet address, or if it is a contract address.

The UI (User Interface) that is displayed varies in each case. If it is a wallet address, the application displays the NFTs that the wallet holds on a selected blockchain network, but if it is a contract address, which is expected to be the contract address of an NFT collection, the application displays all the NFTs that make up the collection.
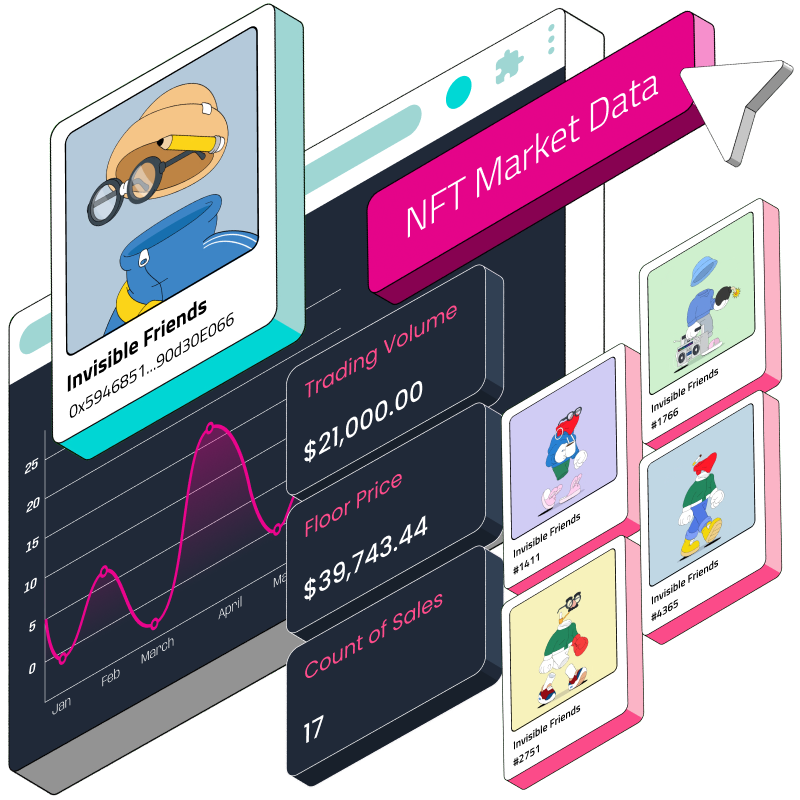
The image below shows the items of an Azuki NFT collection:

When a collection is listed, clicking on an individual NFT will show you the analytics details like sales history, price movement, and traits of that NFT. See the image below:

You can check out and interact with the live application here.
Understanding Covalent's NFT API
Covalent is well known for providing a unified API for blockchain data, which makes it easier for developers to access, analyze, and use blockchain data across different networks. Covalent's NFT API is like a warehouse, exploring all that is hidden about NFTs. It returns useful and hidden information about digital assets.
The following are some of the things you can discover using Covalent's NFT API:
Know who owns what: With this API, you can find out who owns some of your favourite NFTs, like CryptoPunk and Bored Apes.
Trading History: Find out the movement of an NFT across different wallets and marketplaces.
Price Movement: You can also trace the price movement of an NFT from the creation time to current time.
NFT Traits: Get deeper insight into the traits and characteristics that make an NFT unique and valuable.
With all this information, you can build robust NFT analytics tools that can dig up hidden details about an NFT to help investors make informed decisions and also track their favourite NFTs.
Overview of GoldRush Kit
GoldRush Kit is a powerful tool that is built using Covalent's Unified API with ready-made components that developers can easily use in their applications without the need to worry about creating user interfaces from scratch.
GoldRush is like a Lego set for building your own custom application with pre-built components that return real-time blockchain data in well-designed UI cards.
To get started with using GoldRush, use this link, and here is the GoldRush github repo.
Getting Covalent API Key
Interacting with the Unified API requires that you have an account on the Covalent platform, which allows you to generate an API key for interacting with the API endpoints. Follow along with our setup guide to create an account and get your own API key.
Now that you have created an account on Covalent and have an API key to interact with the Covalent Unified API, let’s proceed to building the analytics!
Let’s Buidl
Enough with all the explanations. Let's get into the main business of this guide: building an NFT analytics tool.
Prerequisites
Knowledge of JavaScript.
Understanding of React.js.
Know how to interact with APIs.
Install Node.js and NPM or Yarn on your computer.
Install a text editor or IDE; VSCode is preferred.
Building the NFT Analytics Tool
Step 1: Creating a React Application
We will be building this application using React.js. React is a JavaScript library used in building single-page applications (SPAs). To create a React project, use the following steps:
Create a folder in your PC named nft_analytics_tool.


Open a terminal in the nft_analytics_tool folder and run:
npx create-react-app .
The above command will create a React application inside the nft_analytics_tool folder you have created. Notice the “.” in the above command; it means that the React application should be created in the current directory in which the terminal was opened.


Wait for the React application to complete installing all its dependencies, and then, open the nft_analytics_tool in VSCode. It should look like this:


Step 2: Installing Dependencies
Building the NFT analytics application requires some important dependencies. We will need to install these dependencies first to ensure that our application is completely set and ready for development.
@covalenthq/goldrush-kit: This is the Covalent GoldRush kit dependency that contains all we need to make use of the GoldRush components in our application.
To install the GoldRush kit, run the following command in your VSCode terminal:
npm install @covalenthq/goldrush-kit

**OR**

yarn add @covalenthq/goldrush-kit
ethers: The ethers.js library is used to interact with the blockchain. It is used to interact mostly with Ethereum-based blockchains. We will be using it to check if an address is a smart contract address or an EOA (Externally Owned Account) commonly known as a wallet address.
To install ethers.js, run the following command:
npm install [email protected]
react-router-dom: This is a popular JavaScript library for implementing navigation and routing in React applications. We will be using it to route users to different pages of our application.
Run the following command to install react-router-dom:
npm install [email protected]
We have installed all the necessary dependencies; let’s proceed.
Step 3: Setting Up Bootstrap
Bootstrap is a CSS library used for building responsive web pages. With Bootstrap, you can build web-responsive pages without the need to write your own custom CSS; all you need to do is make use of Bootstrap predefined classes in your HTML components.
We will be using Bootstrap 4 in our application. Use the following procedures to set up Bootstrap:
In your VSCode, go to public/index.html.
Add the following code (Bootstrap CDN) in the head section of the page before the closing head tag (</head>):
<link rel="stylesheet" href="https://cdn.jsdelivr.net/npm/[email protected]/dist/css/bootstrap.min.css" integrity="sha384-zCbKRCUGaJDkqS1kPbPd7TveP5iyJE0EjAuZQTgFLD2ylzuqKfdKlfG/eSrtxUkn" crossorigin="anonymous">
Add the following code (Minified jQuery and Bootstrap JavaScript CDN) before the closing body tag (</body>):
<script src="https://cdn.jsdelivr.net/npm/[email protected]/dist/jquery.slim.min.js" integrity="sha384-DfXdz2htPH0lsSSs5nCTpuj/zy4C+OGpamoFVy38MVBnE+IbbVYUew+OrCXaRkfj" crossorigin="anonymous"></script>
<script src="https://cdn.jsdelivr.net/npm/[email protected]/dist/js/bootstrap.bundle.min.js" integrity="sha384-fQybjgWLrvvRgtW6bFlB7jaZrFsaBXjsOMm/tB9LTS58ONXgqbR9W8oWht/amnpF" crossorigin="anonymous"></script>
The index file should look like this:


Bootstrap is now set, easy, and straightforward.
Step 4: Configure Application to Use react-router-dom
Before using react-router-dom, you must make sure that the entire application is wrapped with BrowserRouter from react-router-dom. To do this:
Go to src/index.js.
Copy the code from this GitHub link and replace the code in the index.js file with the code you have copied. The file should look like this:


Step 5: Update the code in App.js
Go to src/App.js.
Copy the code from here and replace the code in the App.js file. The App.js file should look like this:

Step 6: Create Components Folder and Other Components
We need some other components apart from the App.js file. The convention of creating components in a React application is mostly inside a components folder.
Inside the src folder, create a new folder named components.
In the components folder, create four(4) files named: Collection.js, Home.js, NftAnalytics.js and Nfts.js.


After the Home.js file is filled, next is the NftAnalytics.js file. Copy the code from this link and paste it inside the NftAnalytics.js file.


Step 7: Create a .env.local File to Keep Your API Key
An env file is used to keep private data that you don’t want to be pushed to GitHub when committing your code. We will be using the .env.local file to keep our Covalent API key, which is needed to interact with GoldRush Kit.
In the root project directory, create a .env.local file.
Inside the .env.local file create a variable with the name REACT_APP_COVALENT_API_KEY and set the value to your Covalent API key. See the image for what it should look like.


Creating the .env.local file is the final step. If you followed these steps correctly, you have successfully built an NFT analytics application using Covalent's GoldRush Kit!
Test and Run Your Application
You need to run your application to be sure everything is working as it should.
To do this, open your VSCode terminal and run the following command:
npm start

Deploying the NFT Analytics Tool on Vercel
After building your application, you don’t want to keep it only on your PC; you need to deploy it online so that users can have access to interact with and use it. Follow along to deploy the NFT analytics tool on Vercel.
Make sure that your application has been pushed to GitHub.
Go to your Vercel dashboard or create an account if you don’t already have one.
On your Vercel dashboard, click on the Add New button and select Project.


After clicking on Project, search for the project name. If you have not added the project to your Vercel, click on the Configure GitHub App button, add the project, and save it.
When you have successfully configured the GitHub application, the project will now appear on your Vercel, as shown. Click on the Import button.


After clicking the Import button, you will be redirected to the deployment page. Ensure to set up the environment variables, click the Deploy button afterwards, and wait for your application to deploy successfully.


On successful deployment, Vercel will generate a link with which your application can be accessed and interacted with by anyone who has the link!

Conclusion
This NFT analytics tool gives users and investors more information about their favourite NFT collection in a clear and beautifully presented interface. This was achieved using Covalent's GoldRush Kit, which has ready-made components for reading and presenting NFT data. Explore the GoldRush Kit repo to see what else is possible!