Building with Account Abstraction (Part 2) - Creating UserOps
Introduction
Ethereum's ERC-4337 is a pivotal standard designed to simplify user onboarding into blockchain technology. It eliminates the need for users to grapple with key phrases and private keys. Central to this standard is the concept of Account Abstraction, detailed in the Covalent Docs. Grasping ERC-4337 is vital for developers as it enhances dApp development, offering a streamlined user onboarding experience.
The essence of ERC-4337, titled Account Abstraction Using Alt Mempool, lies in its avoidance of consensus-layer protocol changes, opting instead for a higher-layer infrastructure. Here's what you need to know:
Transactions & Mempool: When an Ethereum node receives a transaction, it's temporarily held in a Mempool. Following a series of validity checks, if deemed authentic, the transaction transitions from the Mempool to a block.
ERC-4337 Highlights:
Operates on a higher-level infrastructure with an Alternate Mempool, abstracting Externally Owned Accounts (EOAs) in favor of Smart Contract Accounts (SCAs).
The Alternate Mempool is managed by Bundlers who aggregate UserOperations, ensuring integrity via reputation scoring and staking.
UserOperations are revolutionary, allowing for batching of requests like APPROVE and TRANSFER events. These operations are enabled by SCAs, distinct from EOAs, and created using the CREATE2 opCode.
UserOperations, after verification for validity, are combined into a Bundle Transaction and appended to a block by Bundlers. Think of Bundlers as transaction verifiers who pass confirmed transactions to the Entry Point Contract.
To realize a UserOperation, four entities play vital roles: the Sender Contract, Paymaster Contract, Bundler, and EntryPoint Contracts. The provided image offers a visual representation of their interplay.

In this guide, I’m going to walk you through how developers can create UserOperations using the Stackup and Biconomy SDKs tailored for Account Abstraction. At the end of this guide, you will have learned to send simple Transfer UserOperation and bundle Staking UserOperations involving Approve and Send functions. I’ll also show you a comparison of the two SDKs.
Prerequisites
Understand the ERC-4337 proposal.
An Understanding of what Node Operators do.
NodeJS is installed on your machine. v18+ recommended.
An IDE, e.g. VSCode.
RPC Method
Interaction with the Ethereum Blockchain typically occurs via nodes broadcasting transactions on-chain using Remote Procedural Call functions. ERC-4337 leverages several RPC methods, but the most crucial is the method call for creating UserOperations, which is eth_sendUserOperation.
The eth_sendUserOperation function submits a User Operation object to the User Operation pool of the client (Bundler). The client MUST validate the UserOperation and return a result based on that validation.
If the User Operation passes validation and is deemed a successful UserOp by the Bundler, the returned result is the hash — userOpHash (analogous to a transaction hash). Conversely, if the User Operation fails, a userOpHash will NOT be returned; instead, a string describing the failure reason will be provided by the Bundler.
A User Operation dispatched with the eth_sendUserOperation RPC method comprises the following object key-value pairs:

{
  "jsonrpc": "2.0",
  "id": 1,
  "method": "eth_sendUserOperation",
  "params": [
    {
      "sender": "address",
      "nonce": "uint256",
      "initCode": "bytes",
      "callData": "bytes",
      "callGasLimit": "uint256",
      "verificationGasLimit": "uint256",
      "preVerificationGas": "uint256",
      "maxFeePerGas": "uint256",
      "maxPriorityFeePerGas": "uint256",
      "paymasterAndData": "bytes",
      "signature": "bytes"
    },
    "entryPoint": "address"
  ]
}
Here, the entryPoint refers to the address in the EntryPoint Smart Contract.
Upon successful execution, the response looks like:
{
  "jsonrpc": "2.0",
  "id": 1,
  "result": "0x1234...5678"
}
The result in this response signifies the userOpHash, and it's analogous to a Transaction hash.
Available SDKs for Creating User Operations
A basic understanding of the RPC method call sets the background for the available SDKs that can be relied upon by Developers to send a User Operation. These SDKs eliminate the need for developers to set up their own infrastructure for the implementation of UserOp.
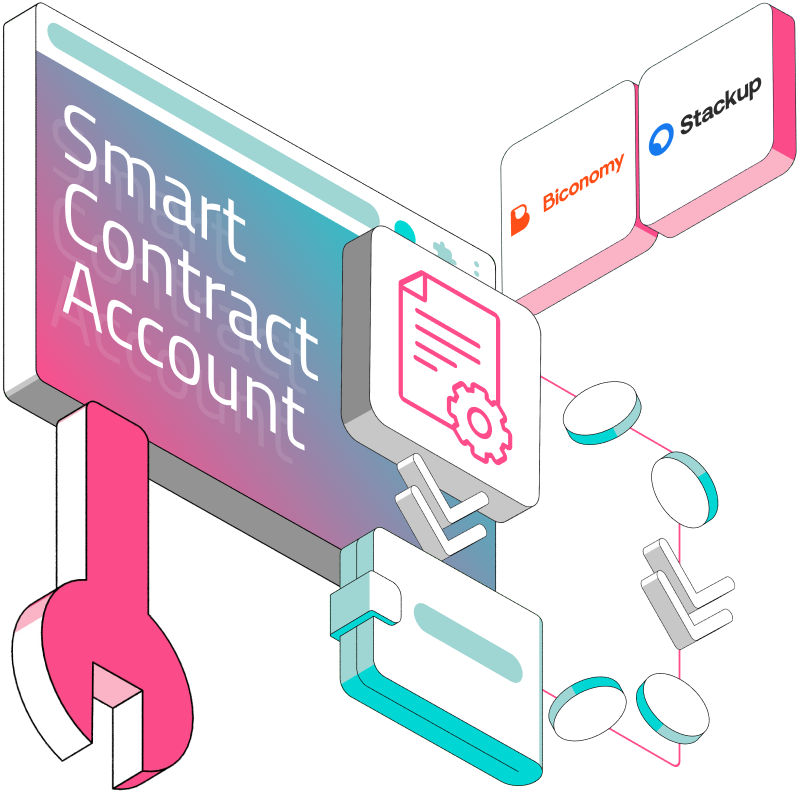
Stackup
StackUp provides a series of Account Abstraction services to developers via their SDK and a Javascript Library that enables ERC-4337 UserOp called userop.js
In this code walkthrough, I explain in steps the process which you can follow to create a UserOp, which is sent to a Bundler. In this first example, we will send a UserOp for a transfer; it is not a transfer for native tokens such as ETH or MATIC; it is the transfer of any ERC-20 token. The same logic can be applied to a native transfer of tokens.
UserOp for Transfers
Step 1: Setup TypeScript Environment
Open VSCode or any IDE of your choice. Create a folder and change the directory into the folder:
$ mkdir stackup-sh-aa && cd stackup-sh-aa
Create a package.json file for dependencies.
$ npm init -y
Install the necessary dependencies:
$ npm install [email protected] useropjs
$ npm i -D typescript ts-node
We are specifically installing this version of EthersJS, as the BaseWallet object in v6 currently returns errors with the StackUp implementation.
Initialize TypeScript configuration:
./node_modules/.bin/tsc --init
In the new ts-config.json file, uncomment the line:
"resolveJsonModule": true
This will enable us to import JSON files which we will read from.
Step 2: Create TypeScript Files and Set Up Configurations
Create an index.ts file.
Declare the methods we need from the dependencies installed:
import { ethers } from "ethers";
import { Client, Presets } from "userop";
Create a config.json file where we will store the Signing Key and the RPC URL we will use. Create a placeholder for the keys:
{
  "RPC_Url": "...",
  "Signing_Key": ""
}
To get your StackUp node RPC URL, create an account and login to go to your Dashboard. Create a New Instance and set it to the Polygon Mumbai Testnet. Copy the RPC URL by clicking on the Node button.

You can generate a PrivateKey, which is any random 32-byte string preceded by 0x using ethers.utils.randomBytes(32). Alternatively, you can copy the Private Keys to any EOA account you own.
You can use this script to generate a random key in your browser console or terminal with curl.
const randomPrivateKey = ethers.Wallet.createRandom().privateKey;
console.log(`Random Private Key: ${randomPrivateKey}`);
Add the Private Key to the config.json file and import it into index.ts.
import config from "./config.json" assert { type: "json" };Seeing as we are transferring an ERC-20 token and not a Native token, we are going to require the contract address and ABI of a deployed ERC-20 token to interact with. For this purposes of your learning, I have deployed a simple ERC-20 token to the Polygon Mumbai Network here: https://mumbai.polygonscan.com/address/0x317e4c04c7fdf44fa72bc997aece1b691159f95f#writeContract.
You can access the contract, mint some for yourself, and copy the ABI, which we are going to use in the next step.
Create a file called abi.json to store the deployed token ABI, and import it into index.ts.
import ERC20_ABI from "./abi.json";
Step 3: Create a Smart Contract Account (SCA)
To carry out a UserOp, we need to create a Smart Contract Account (SCA); you can read my previous article on the importance of SCAs and how they are created here.
An SCA is a core component of a UserOp; in the next step, we will create an SCA and log in to the console. In this code walkthrough, we will not be using a PayMaster to sponsor UserOp; we are going to paste the generated SCA into a faucet and get some Matic tokens to pay gas for the UserOp.
To create an SCA, implement the main function:
export default async function main() {
  const simpleAccount = await Presets.Builder.SimpleAccount.init(
    new ethers.Wallet(config.Signing_Key),
    config.rpcUrl
  );
  const address = simpleAccount.getSender();
  console.log(`SimpleAccount address: ${address}`);
}
Fund the SCA with test Matic from the Polygon Faucet. Also, mint some MTK (our demo token) to the created SCA.
Step 4: Implement the Transfer UserOp
To create a Transfer UserOp, we are going to update the main method to accept token address, recipient address, and amount.
async function main(tkn: string, t: string, amt: string) {Update the method with client initialization from the UserOp library by parsing the StackUp RPC_Url.
Using the EthersJS Library, we will use the available provider's method to access the same RPC_Url and interact with the deployed ERC-20 token.
const client = await Client.init(config.RPC_Url);

const provider = new ethers.providers.JsonRpcProvider(config.RPC_Url);

const token = ethers.utils.getAddress(tkn);

const to = ethers.utils.getAddress(t);

const erc20 = new ethers.Contract(token, ERC20_ABI, provider);
Obtain the token details and prepare the transfer:
const [symbol, decimals] = await Promise.all([
  erc20.symbol(),
  erc20.decimals(),
]);
const amount = ethers.utils.parseUnits(amt, decimals);

console.log(`Transferring ${amt} ${symbol}...`);
Step 5: Send the UserOp
The client instance relies on the Stackup method call sendUserOperation to batch the transaction, assign it to the SCA and broadcast it to the bundler.
const res = await client.sendUserOperation(
  simpleAccount.execute(
    erc20.address,
    0,
    erc20.interface.encodeFunctionData("transfer", [to, amount])
  ),
  {
    onBuild: (op) => console.log("Signed UserOperation:", op),
  }
);
Monitor the transaction’s progress:
console.log(`UserOpHash: ${res.userOpHash}`);
console.log("Waiting for transaction...");
const ev = await res.wait();
console.log(`Transaction hash: ${ev?.transactionHash ?? null}`);
To execute the UserOp, you will parse arguments to the method call at the end of the code. We will be sending some MTK to any EOA. All arguments are strings.
main(
  "0x317E4C04C7fDf44fa72bC997AeCe1b691159F95F",
  "any-EOA-address",
  "5"
);
Step 6: Package Configuration and Execution
Update the
package.jsonwith a script to run your project:
"scripts": {
  "start": "node --loader ts-node/esm index.ts"
}
Remove the line to create a Private Key using ethers.Wallet or comment it out and update the file to enable main to be called as a method by adding main() to the bottom of the file.
Then, run the application:
$ npm start
There! Look at the console! You have sent a UserOp!
UserOp for Approve and Send
Step 1: Import Necessary Libraries and Configurations
import { ethers } from "ethers";
import { Presets, Client } from "userop";
import config from "./config.json" assert { type: "json" };

const signingKey = config.SIGNING_KEY;
const rpcUrl = config.RPC_URL;
Step 2: Understand the Context
Much like the example above, this will take three arguments. It is useful, for instance, where a deployed contract needs to spend your tokens on your behalf, for example, in a SWAP. Typically, with EOAs, you must first APPROVE and then carry out a TRANSFER. With a UserOp, both APPROVE and TRANSFER can be bundled into UserOp and carried out simultaneously! Therein lies the beauty of Account Abstraction.
Step 3: Implement the Approve and Send Function
This is the first function that will be called in the next. It takes three arguments, which will be fixed and then parses it to the sendUserOperation method. In this step, we use the EthersJS library to set the various required arguments.
async function approveAndSend(token: string, to: string, value: string): Promise<any[]> {
    const ERC20_ABI = require("./abi.json");
    const provider = new ethers.providers.JsonRpcProvider(rpcUrl);
    const erc20 = new ethers.Contract(token, ERC20_ABI, provider);

    const decimals = await erc20.decimals();
    const amount = ethers.utils.parseUnits(value, decimals);

    const approve = {
        to: token,
        value: ethers.constants.Zero,
        data: erc20.interface.encodeFunctionData("approve", [to, amount]),
    };

    const send = {
        to: token,
        value: ethers.constants.Zero,
        data: erc20.interface.encodeFunctionData("transfer", [to, amount]),
    };

    return [approve, send];
}
Step 4: Create the Main Execution Function
Unlike in the prior example, to create an SCA here, we use the Kernel option available in the StackUp SDK, which gives us access to an executeBatch method call for executing multiple UserOp.
async function main() {
    // Initialize the UserOp builder
    const signer = new ethers.Wallet(signingKey);
    const builder = await Presets.Builder.Kernel.init(signer, rpcUrl);
    const address = builder.getSender();
    console.log("address: ", address);

    // Prepare the calls
    const to = "0x74F73c34EA89c6A8b4de1Bc35017F6542D9419CB";
    const token = "0x317E4C04C7fDf44fa72bC997AeCe1b691159F95F";
    const value = "1";
    const calls = await approveAndSend(token, to, value);

    // Execute the batched calls
    builder.executeBatch(calls);
    console.log(builder.getOp());
}
Step 5: Send the UserOp Using the Client Instance
// Send the user operation
const client = await Client.init(rpcUrl);
const res = await client.sendUserOperation(builder, {
    onBuild: (op) => console.log("Signed UserOperation: ", op),
});

console.log(`UserOpHash: ${res.userOpHash}`);
console.log("Waiting for transaction...");
const ev = await res.wait();
console.log(`Transaction hash: ${ev?.transactionHash ?? null}`);export default main; main(); // Invoke the main function
Step 6: Update Package Script and Run
Add this script to your package.json:
"scripts": {
    "start": "node --loader ts-node/esm index.ts"
}
Comment out or remove any redundant code related to creating a PrivateKey with ethers.Wallet and update the file to enable main() to be called as a method by adding main() to the bottom of the file.
Then, run:
$ npm start
There! Look at the Console! You have sent a Batch Call UserOp!
Biconomy
The Biconomy Modular SDK is a package for common account abstraction use cases. The SDK operates in a non-custodial manner, giving developers flexibility over their implementation using the SDK.
UserOp for Transfers
Step 1: Initial Setup
Refer to Steps 1 and 2 in the "UserOp for Transfers" section from the StackUp example, since this is also a TypeScript project.
Step 2: Install Dependencies and Set Up Configuration
Building with an SDK typically requires installing the dependencies where we will access certain methods in our build. Biconomy provides AA-specific dependencies that enable SCA creation, bundler access, PayMaster contracts, etc.
Install the necessary Biconomy dependencies:
npm i [email protected] @biconomy/bundler @biconomy/core-types @biconomy/account
Create an index.ts file and add the necessary imports:
import { IBundler, Bundler } from "@biconomy/bundler";
import { ChainId } from "@biconomy/core-types";
import {
    BiconomySmartAccount,
    BiconomySmartAccountConfig,
    DEFAULT_ENTRYPOINT_ADDRESS,
} from "@biconomy/account";
import { Wallet } from "ethers";
Prepare a config.json file to store your Signing Key and Bundler URL:
{
    "Signing_Key": "...",
    “Bundler_Url”: “...”
}
Add a Private Key to the config.json file and import it into index.ts:
import config from "./config.json" assert { type: "json" };Step 3: Create the Smart Contract Account (SCA)
To carry out a UserOp, we need to create a Smart Contract Account SCA. To create an SCA in Biconomy, we need to use the available method calls and the Private Key.
Set up the configuration:
const wallet = new Wallet(config.Signing_Key);
const bundler: IBundler = new Bundler({
    bundlerUrl: config.Bundler_Url,
    chainId: ChainId.POLYGON_MUMBAI,
    entryPointAddress: DEFAULT_ENTRYPOINT_ADDRESS,
});

const biconomySmartAccountConfig: BiconomySmartAccountConfig = {
    signer: wallet,
    chainId: ChainId.POLYGON_MUMBAI,
    bundler: bundler,
};

async function createAccount() {
    const biconomyAccount = new BiconomySmartAccount(biconomySmartAccountConfig);
    const biconomySmartAccount = await biconomyAccount.init();
    console.log("owner: ", biconomySmartAccount.owner);
    console.log("address: ", await biconomySmartAccount.getSmartAccountAddress());
    return biconomyAccount;
}
An instance of the BiconomySmartAccountConfiguration takes in the key-value pairs to designate the Private Key and the chain where the SCA is deployed. It also takes in the bundler instance where we can access methods such as estimateUserOpGas when the user is carrying out the UserOp.
Step 4: Implement the Main Execution Function
The main function below is where the UserOp is carried out. We call the createAccount method to get access to the smartAccount, and the validation is carried out in the buildUserOp method where we confirm that the user has enough gas to carry out the UserOp as we are not using a PayMaster.
async function main() {
    console.log("creating account");
    const smartAccount = await createAccount();
    const transaction = {
        to: "0xD1bC7D2e1D5463CA115b8C999ef78B100cf0dF23",
        data: "0x",
        value: ethers.utils.parseEther("0.01"),
    };

    const userOp = await smartAccount.buildUserOp([transaction]);
    userOp.paymasterAndData = "0x";
    const userOpResponse = await smartAccount.sendUserOp(userOp);
    const transactionDetail = await userOpResponse.wait();
    console.log("transaction detail below");
    console.log(transactionDetail);
}

main();
You can paste the created SCA in the Polygon Faucet to get some MATIC, and also the MTK contract shared above to MINT some MTK.
Step 5: Update Package Script and Run
Add the following script to your package.json file:
"scripts": {
    "start": "node --loader ts-node/esm index.ts"
}
Remove the line to create a Private Key using ethers.Wallet or comment it out. You've already added the main() function invocation to the end of your script.
Finally, run your script:
$ npm start
There! Look at the Console!
UserOp for Approve and Send
Step 1: Initial Setup
Follow Steps 1 and 2 in the "UserOp for Transfers" section from the StackUp example, given its similarity as a TypeScript project.
Step 2: Installation, Configuration and Contract Interactions
Install the following dependecies by running this command:
npm i [email protected] @biconomy/bundler @biconomy/core-types @biconomy/account
Create an index.ts file and declare the imports:
import { IBundler, Bundler } from "@biconomy/bundler";
import { ChainId } from "@biconomy/core-types";
import {
    BiconomySmartAccount,
    BiconomySmartAccountConfig,
    DEFAULT_ENTRYPOINT_ADDRESS,
} from "@biconomy/account";
import { Wallet, ethers } from "ethers";
Create a config.json file to store the Signing Key, RPC URL and Bundler URL. Create a placeholder for the keys:
{
    "RPC_Url": "...",
    "Signing_Key": "...",
    "Bundler_Url": "..."
}
Incorporate the configuration into index.ts:
import config from "./config.json" assert { type: "json" };Like we did in the Stackup example above, we can use the demo MTK token I deployed for the transfer. Fetch the ABI from the provided Polygon Mumbai Network link, save it in abi.json, and then import it:
import ERC20ABI from "./abi.json" assert { type: "json" };Step 3: Biconomy SDK Initialization
Initialize the Biconomy Smart Account SDK:
let signer = new ethers.Wallet(config.Signing_Key);
const eoa = await signer.getAddress();
console.log(`EOA address: ${eoa}`);
Create bundler instance:
const bundler = new Bundler({
    bundlerUrl: config.Bundler_Url,
    chainId: ChainId.POLYGON_MUMBAI,
    entryPointAddress: DEFAULT_ENTRYPOINT_ADDRESS,
});
Now, Biconomy smart account configuration. Note that paymaster and bundler are optional. You can choose to create new instances of this later.
const biconomySmartAccountConfig = {
    signer: signer,
    chainId: ChainId.POLYGON_MUMBAI,
    rpcUrl: config.RPC_Url,
    bundler: bundler,
};

const biconomyAccount = new BiconomySmartAccount(biconomySmartAccountConfig);
const biconomySmartAccount = await biconomyAccount.init();
const smartAccountInfo = await biconomySmartAccount.getSmartAccountAddress();
console.log(`SimpleAccount address: ${smartAccountInfo}`);
Step 4: Construct the UserOp
Build the UserOp for the ERC-20 transfer by generating ERC-20 transfer data and encode an ERC-20 token transfer to the recipient with the specified amount:
const readProvider = new ethers.providers.JsonRpcProvider(config.RPC_Url);
const tokenContract = new ethers.Contract(tokenAddress, ERC20ABI, readProvider);
let decimals = 18;

try {
    decimals = await tokenContract.decimals();
} catch (error) {
    throw new Error("invalid token address supplied");
}

const amountGwei = ethers.utils.parseUnits(amount.toString(), decimals);
const data = (await tokenContract.populateTransaction.transfer(recipientAddress, amountGwei)).data;
const approve = {
    to: tokenAddress,
    data,
};
const send = {
    to: recipientAddress,
};
const transaction = [approve, send];
const userOp = await biconomySmartAccount.buildUserOp(transaction);
Step 5: Send UserOp to Bundler
Sign the UserOp and send it to the bundler. The below function gets the signature from the user (signer provided in Biconomy Smart Account) and also sends the full Op to the attached bundler instance:
try {
    const userOpResponse = await biconomySmartAccount.sendUserOp(userOp);
    console.log(`userOp Hash: ${userOpResponse.userOpHash}`);
    const transactionDetails = await userOpResponse.wait();
    console.log(`transactionDetails: ${JSON.stringify(transactionDetails, null, "\\t")}`);
} catch (e) {
    console.log("error received ", e);
}
Call the method with the following arguments:
Main(
    "any-EOA-address",
    5,
    "0x317E4C04C7fDf44fa72bC997AeCe1b691159F95F"
);
That's it!
Comparison of Stackup and Biconomy
Both StackUp and Biconomy aim to simplify and streamline the process of account abstraction for Ethereum developers. It is important to note that both SDKs make calls to the standard RPC method calls provided by the ERC-4337 specification.
The method calls that I’ll mention here are:
eth_estimateUserOperationGasYou can think of this call as responsible for the simulation, i.e. Validation phase of a UserOp.eth_sendUserOperationThis is the execution phase of a UserOp where the “Transaction” is sent to a Bundler.
What is primarily different is the approach that each of the SDKs takes in sending a UserOp. Below is a comparison of their features and implementation methods.
Both tools have their advantages. While Stackup offers simplicity and rapid development Biconomy allows for detailed validation and execution, modular development, and can support complex projects.
Conclusion
In this guide, I have extensively walked you through the steps of sending User Operations for sending Native Tokens and ERC-20 Tokens and for making batch Transactions. The critical learning curve is understanding that an APPROVE and TRANSFER transaction can be batched into an array and sent as one UserOp. Grasping this concept opens up the vistas of what is possible with UserOp. Consequently, a developer's capacity to create is virtually limitless once they understand how to batch transactions into a single UserOp.