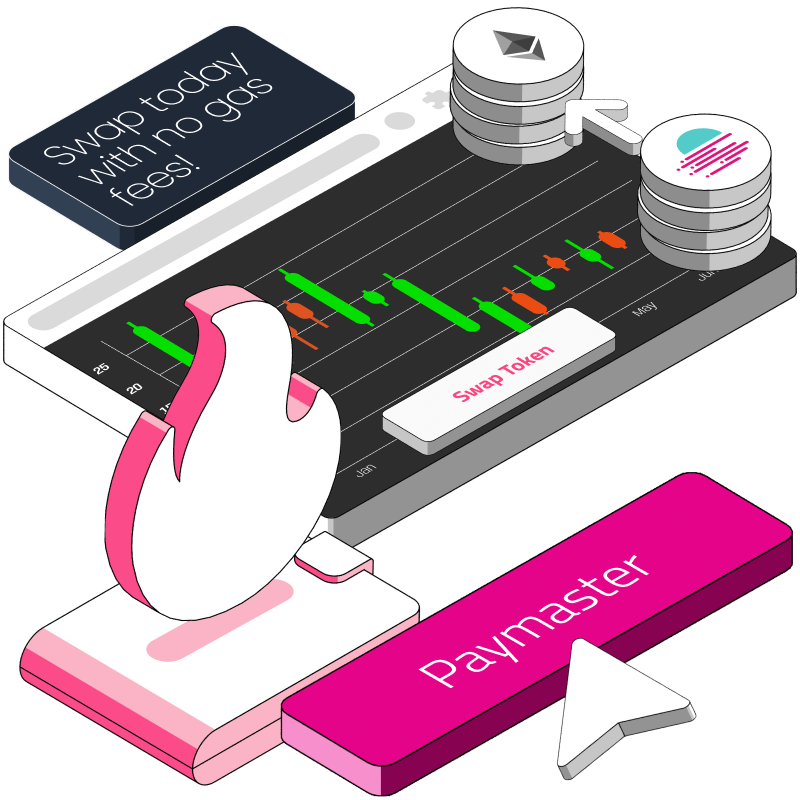
Building with Account Abstraction (Part 4) - Paymaster User Interface
Introduction
Welcome back to our Building with Account Abstraction series! In our previous guide, we successfully configured our Biconomy dashboard, Paymaster, gas tank, and policies. This guide focuses on the UI, detailing the creation of login, logout, and account creation functionalities, along with token minting and giving tips. By the end of this guide, we aim to have a fully functional gasless dApp, enabling users to transact without incurring gas fees.
Prerequisites
Before proceeding, ensure you have:
Familiarity with the ERC-4337 proposal.
Understanding of Node Operators' roles.
NodeJS (version 18 or higher) installed.
An IDE like VSCode.
Knowledge of previous articles in this series.
Understanding of Smart Contract ABIs.
Experience with the Biconomy SDK.
Setting Up Login, Logout, and Account Creation
Step 1 - Set Up Libraries
Begin by setting up the SDK using Biconomy Libraries. Install the following libraries:

$ yarn add @biconomy/account @biconomy/bundler @biconomy/common @biconomy/core-types @biconomy/paymaster @biconomy/web3-auth [email protected]
For understanding these libraries, refer to this guide.
Additionally, install these devDependencies:
$ yarn add @esbuild-plugins/node-globals-polyfill rollup-plugin-polyfill-node stream-browserify -D
Update your vite.config.ts as follows:
import { defineConfig } from 'vite'
import react from '@vitejs/plugin-react'
import { NodeGlobalsPolyfillPlugin } from "@esbuild-plugins/node-globals-polyfill";

export default defineConfig({
	plugins: [react()],
	optimizeDeps: {
		esbuildOptions: {
			define: { global: "globalThis" },
			plugins: [NodeGlobalsPolyfillPlugin({ buffer: true })],
		},
	},
	resolve: { alias: { stream: "stream-browserify", util: "util" } },
})
Step 2 - Import Libraries
In the App.tsx file, import the following libraries:
import "@Biconomy/web3-auth/dist/src/style.css";
import SocialLogin from "@biconomy/web3-auth";
import { ChainId } from "@biconomy/core-types";
import { ethers } from 'ethers'
import { IBundler, Bundler } from '@biconomy/bundler'
import { BiconomySmartAccountV2, DEFAULT_ENTRYPOINT_ADDRESS } from "@biconomy/account"
import { IPaymaster, BiconomyPaymaster } from '@biconomy/paymaster'
Here’s a breakdown of the various libraries:
SocialLogin from @biconomy/web3-authis a class from the Biconomy SDK that allows you to leverage Web3Auth for social logins.ChainId from @biconomy/core-typesgrants access to a list of Biconomy supported blockchain networks, in this instance, Polygon Mumbai.IBundlerandBundlertake UserOperations, include them in a mempool and handle sending them to an entry point contract to be executed as a transaction on-chain.BiconomySmartAccount,BiconomySmartAccountConfig,DEFAULT_ENTRYPOINT_ADDRESS from @biconomy/accountis used to handle the configuration and methods of Smart Contract Accounts.IPaymasterandPaymasterwill be used to sponsor gas fees for an account, provided specific predefined conditions are satisfied such as setting up the gas tank which we already have.
Prior to the app function, configure the bundler and Paymaster:
const bundler: IBundler = new Bundler({
	bundlerUrl: "<https://bundler.biconomy.io/api/v2/80001/nJPK7B3ru.dd7f7861-190d-41bd-af80-6877f74b8f44>",
	chainId: ChainId.POLYGON_MUMBAI,
	entryPointAddress: DEFAULT_ENTRYPOINT_ADDRESS,
});

const paymaster: IPaymaster = new BiconomyPaymaster({
	paymasterUrl: "<https://paymaster.biconomy.io/api/v1/80001/><Your-API-Key>",
});
Note: Replace <Your-API-Key> with your actual API key. For ViteJS, parse .env files using import.meta.env.VITE_API_KEY.
The bundler variable, of type IBundler, is set up with the bundlerUrl and the chainId. The bundlerUrl, provided by Biconomy, allows the Bundler to package UserOperations and make a handleOps call to the EntryPointContract, as outlined in the ERC 4337 specifications.
Step 3 - Authentication
The next step is to implement authentication, which allows us to create Smart Contract Accounts for users signing up via social authentication or Metamask. For this, we need to manage the app's state using ReactJS. This helps us track whether a user is logged in, logged out, or a first-time user. To start, we first import the useState, useEffect, and useRef React hooks in the App.tsx file:
import { useState, useEffect, useRef } from "react";Also, import methods from @biconomy/module:
import {
	ECDSAOwnershipValidationModule,
	DEFAULT_ECDSA_OWNERSHIP_MODULE,
} from "@biconomy/modules";
Set up state variables for tracking smart account, login status, loading state, provider, and social login SDK reference:
const [smartAccount, setSmartAccount] = useState<any>(null);
const [interval, enableInterval] = useState(false);
const sdkRef = useRef<SocialLogin | null>(null);
const [loading, setLoading] = useState<boolean>(false);
const [provider, setProvider] = useState<any>(null);
Next, let's incorporate a useEffect hook:
useEffect(() => {
    let configureLogin;
    if (interval) {
        configureLogin = setInterval(() => {
            if (sdkRef.current?.provider) {
                setupSmartAccount();
                clearInterval(configureLogin);
            }
        }, 1000);
    }
}, [interval]);
This useEffect hook triggers after the login component opens. It checks if a provider is available and then executes the function to set up the smart account.
Now, let's construct the login function.
Login
Insert the following script:
async function login() {
    if (!sdkRef.current) {
        const socialLoginSDK = new SocialLogin();
        const signature1 = await socialLoginSDK.whitelistUrl("<http://127.0.0.1:5173/>");
        await socialLoginSDK.init({
            chainId: ethers.utils.hexValue(ChainId.POLYGON_MUMBAI).toString(),
            network: "testnet",
            whitelistUrls: { "<http://127.0.0.1:5173/>": signature1 },
        });
        sdkRef.current = socialLoginSDK;
    }
    if (!sdkRef.current.provider) {
        sdkRef.current.showWallet();
        enableInterval(true);
    } else {
        setupSmartAccount();
    }
}
This asynchronous login function manages the application's login flow:
SDK Initialization: If
sdkRef(a reference to the Biconomy SDK) is null, indicating the SDK isn't initialized, it creates a new SocialLogin instance, whitelists a local URL, and initializes the SDK with Polygon Mumbai testnet configuration. The initialized SDK is then assigned tosdkRef.current.Provider Check: The function checks if the
sdkRefprovider is set. If not, it displays the wallet interface for user login usingsdkRef.current.showWallet()and activates the interval (established in a previoususeEffect) by callingenableInterval(true).Smart Account Setup: If the provider is already set, the user is logged in, and it proceeds to set up the smart account with
setupSmartAccount().
Next, implement Smart Contract Account creation upon login:
Smart Account Creation
Add the following script after the login script:
async function setupSmartAccount() {
    if (!sdkRef?.current?.provider) return;
    sdkRef.current.hideWallet();
    setLoading(true);
    const web3Provider = new ethers.providers.Web3Provider(sdkRef.current.provider);

    const module = await ECDSAOwnershipValidationModule.create({
        signer: web3Provider.getSigner(),
        moduleAddress: DEFAULT_ECDSA_OWNERSHIP_MODULE,
    });

    try {
        let biconomySmartAccount = await BiconomySmartAccountV2.create({
            chainId: ChainId.POLYGON_MUMBAI,
            bundler: bundler,
            entryPointAddress: DEFAULT_ENTRYPOINT_ADDRESS,
            defaultValidationModule: module,
            activeValidationModule: module
        });
        console.log(`address: ${await biconomySmartAccount.getAccountAddress()}`);
        console.log(`deployed: ${await biconomySmartAccount.isAccountDeployed(biconomySmartAccount.accountAddress)}`);

        setSmartAccount(biconomySmartAccount.accountAddress);
        setLoading(false);
    } catch (err) {
        console.error("error setting up smart account... ", err);
    }
}
The setupSmartAccount function initializes a smart account using Biconomy and connects it with the Web3 provider. Here's a breakdown of its key steps:
Provider Check:
if (!sdkRef?.current?.provider) return;checks if thesdkRefobject exists and has a provider. If not, the function exits early.Hide Wallet Interface:
sdkRef.current.hideWallet();is called to hide the wallet or authentication interface.Loading State:
setLoading(true);sets theloadingstate to true, typically to indicate that an asynchronous operation is underway.Web3 Provider Setup:
const web3Provider = new ethers.providers.Web3Provider(sdkRef.current.provider);creates a newWeb3Providerinstance, usingsdkRef.current.provideras the Web3 provider.ECDSA Ownership Validation Module: Initializes an
ECDSAOwnershipValidationModuleto handle the ownership validation aspect.const module = await ECDSAOwnershipValidationModule.create({
signer: web3Provider.getSigner(),
moduleAddress: DEFAULT_ECDSA_OWNERSHIP_MODULE,
});
BiconomySmartAccount Creation and Configuration
The
BiconomySmartAccountV2.create()method initializes a new BiconomySmartAccount instance with specified configurations.chainId: Specifies the blockchain network, set here as Polygon Mumbai.bundler: A variable likely defined elsewhere for optimizing and bundling smart contracts.paymaster: A component for handling payment processing.Upon successful creation, the smart account's address and deployment status are logged.
State Updates:
setSmartAccount(biconomySmartAccount): Saves the BiconomySmartAccount instance in the state for accessibility across the application.setLoading(false): Indicates the end of the asynchronous operation by settingloadingto false.
Error Handling: In case of an error during the function's execution, it's caught and logged to the console.
In summary, setupSmartAccount is responsible for checking the availability of the Biconomy provider, hiding the wallet interface, establishing a Web3 provider, creating a smart account, and updating relevant application states. Any errors encountered during this process are logged for debugging purposes.
Login Button Check
We are updating the UI to showcase the Login functionality.
To verify the button's functionality, we'll implement a state check on the navigation bar and the UI. Please insert the following code snippet before the closing </nav> tag:
 {!smartAccount && !loading && (
  <div className="w-full block flex-grow lg:flex lg:items-center lg:w-auto">
    <div className="text-sm lg:flex-grow">
      <a
        href="#responsive-header"
        className="block mt-4 lg:inline-block lg:mt-0 text-teal-200 hover:text-white mr-4"
      >
        Welcome
      </a>
    </div>
    <div>
      <button
        onClick={login}
        className="inline-block bg-teal-500 text-sm px-4 py-2 leading-none border rounded text-white border-white hover:border-transparent hover:text-teal-500 hover:bg-white mt-4 lg:mt-0"
      >
        Log in
      </button>
    </div>
  </div>
)}

{loading && <p>Loading account details...</p>}

{smartAccount && (
  <div className="w-full block flex-grow lg:flex lg:items-center lg:w-auto">
    <div className="text-sm lg:flex-grow">
      <a
        href="#responsive-header"
        className="block mt-4 lg:inline-block lg:mt-0 text-teal-200 hover:text-white mr-4"
      >
        {smartAccount}
      </a>
    </div>
    <div>
      <button
        onClick={logout}
        className="inline-block bg-teal-500 text-sm px-4 py-2 leading-none border rounded text-white border-white hover:border-transparent hover:text-teal-500 hover:bg-white mt-4 lg:mt-0"
      >
        Log out
      </button>
    </div>
  </div>
)}
Restart the server and test the Login functionality. A modal will appear; select the MetaMask Login option.

Upon successful login, a Smart Contract Account will be generated, visible on the nav bar.

Logout
Next, we'll implement the Logout functionality.
Add the following script:
const logout = async () => {
  if (!sdkRef.current) {
    console.error("Web3Modal not initialized.");
    return;
  }

  await sdkRef.current.logout();
  sdkRef.current.hideWallet();
  setSmartAccount(null);
  enableInterval(false);
};
Uncomment the onClick attribute in the Logout button.
The logout function is an asynchronous function designed to manage the logout process:
SDK Initialization Check: Initially, it verifies if
sdkRef(a reference to the Biconomy SDK instance) is initialized. If not, it logs an error and returns early.Logout and Hide Wallet: For an initialized SDK, it logs the user out (
sdkRef.current.logout()) and hides the wallet (sdkRef.current.hideWallet()), usingawaitfor these asynchronous operations.Clear Smart Account and Disable Interval: Post-logout, it sets the smart account to
null(setSmartAccount(null)) and disables the interval (enableInterval(false)).
In essence, the logout function checks SDK initialization, performs logout and wallet hiding if initialized, and then clears the smart account and disables the interval. If the SDK isn't initialized, it logs an error and halts further execution.
Let's update the UI to display different content based on whether a user is logged in. Below the first div, add a ternary operator to check if the smartAccount state is true. Here's the updated code for clarity and conciseness:
{!smartAccount ? (
  <div className="text-gray-900">
    Click the button above to connect your wallet.
  </div>
) : (
  <div className="grid gap-48 grid-cols-2 grid-rows-2 m-6">
    <div>
      <div className="w-full rounded-md shadow-sm ring-1 ring-inset ring-gray-300 focus-within:ring-2 focus-within:ring-inset focus-within:ring-teal-600 sm:max-w-md">
        <input
          type="text"
          name="amount"
          id="amount"
          autoComplete="amount"
          className="block w-full border-0 bg-transparent py-1.5 pl-1 text-gray-900 placeholder:text-gray-700 focus:ring-0 sm:text-sm sm:leading-6"
          placeholder="$"
        />
      </div>
      <div className="mt-6 gap-x-6">
        <button
          type="submit"
          className="mb-28 rounded-md w-40 bg-teal-600 px-3 py-2 text-sm font-semibold text-white shadow-sm hover:bg-teal-500 focus-visible:outline focus-visible:outline-2 focus-visible:outline-offset-2 focus-visible:outline-teal-600"
        >
          Mint Token
        </button>
      </div>
      <div className="w-full rounded-md shadow-sm ring-1 ring-inset ring-gray-300 focus-within:ring-2 focus-within:ring-inset focus-within:ring-teal-600 sm:max-w-md">
        <input
          type="text"
          name="amount"
          id="amount"
          autoComplete="amount"
          className="block w-full border-0 bg-transparent py-1.5 pl-1 text-gray-900 placeholder:text-gray-700 focus:ring-0 sm:text-sm sm:leading-6"
          placeholder="$"
        />
      </div>
      <div className="mt-6 gap-x-6">
        <button
          type="submit"
          className="rounded-md w-40 bg-teal-600 px-3 py-2 text-sm font-semibold text-white shadow-sm hover:bg-teal-500 focus-visible:outline focus-visible:outline-2 focus-visible:outline-offset-2 focus-visible:outline-teal-600"
        >
          Give Tip
        </button>
      </div>
    </div>
    <div>
      <p className="mb-2 block text-lg font-medium leading-6 text-gray-900">
        To test the DEMO, mint MTK Tokens.
      </p>
      <p className="mb-2 block text-sm font-medium leading-6 text-gray-900">
        The MTK Token has 18 decimal places.
      </p>
      <p className="block text-sm font-medium leading-6 text-gray-900">
        Using 'Give Tip' will also approve the amount you wish to tip.
      </p>
    </div>
  </div>
)}
The app now reflects different states for logged-in and logged-out users, as shown:

With authentication functionality established, the next step involves interacting with Smart Contract methods. To verify the existence of the Smart Contract Account on the chain, paste the generated address into the Polygon Mumbai explorer.

The contract appears as an address since it hasn't been initialized on the blockchain yet. The upcoming section will delve into sending UserOperations without gas fees using the Paymaster and the Smart Contract Account created for the user.
Minting Tokens and Giving Tips
Now that we’ve covered setting up login, logout, and account creation using BiconomyAccountV2, we'll implement smart contract functions using this setup.
Step 1 - Mint Tokens
We're starting with the mint method. For better organization, create a Components folder in your src directory and add a token.tsx file for Smart Contract method scripts.
In token.tsx, begin by importing necessary libraries:
import React, { useState } from "react";
import { BiconomySmartAccount } from "@biconomy/account";
import { ethers } from "ethers";
Define an interface for component props:
interface Props {
  smartAccount: BiconomySmartAccount;
}
Declare the main function with props:
export const TokenContract: React.FC<Props> = ({ smartAccount }) => {
  // Function content here
};
First we will update the function with the states that we are going to interact with in the course of the build:
const [amount, setAmount] = useState<number>(0);
We are interacting with an instance of the deployed contract, and at this point we can store the token contract address in a variable:
const tokenAddress = "0x317E4C04C7fDf44fa72bC997AeCe1b691159F95F";
We're now ready to write our first function for minting tokens.
This involves a state-changing transaction where we'll build a UserOperation and send it to the bundler. To start, we'll use the ethers.utils.Interface method to interact with the specific ABI function in our smart contract, specifically the mint function.
Let's begin by declaring our asynchronous function:
const mintTokens = async () => {
    try {

    } catch (error) {
        console.log({ error });
    }
};
In the try block, we do the following:
const mintTx = new ethers.utils.Interface([
    "function mint(uint256 amount)"
]);

const data = mintTx.encodeFunctionData("mint", [amount]);
Here, we declare two variables. The first variable, mintTx, parses the specific function in the contract ABI we'll be interacting with using utils.Interface. The second variable, data, is encoded using the method utils.Interface.encodeFunctionData. encodeFunctionData returns the encoded data, suitable as transaction data for a fragment. In this case, it's the function ABI and the arguments we're passing to it, specifically amount.
Next, we declare an object to hold the values that will make up the UserOperation:
const tx1 = {
    to: tokenAddress,
    data: data,
};
Remember, we previously parsed the BiconomySmartAccount props at the component's beginning, which are now available in the app as smartAccount. The subsequent step involves building a partial UserOperation to simulate a UserOperation before sending it:
The method used for this is buildUserOp(), into which we pass the tx1 object as an array.
const partialUserOp = await smartAccount.buildUserOp([tx1]);
It's useful to log this to the console to view the response:
console.log(partialUserOp);
We're now ready to send our first UserOperation. Remember, we set up the Paymaster to provide a gasless experience for our users. To initialize the Paymaster, we'll specify the Paymaster type by extending it from smartAccount.paymaster:
const biconomyPaymaster =
    smartAccount.paymaster as IHybridPaymaster<SponsorUserOperationDto>;
Finally, we access the Paymaster service and set the mode to PaymasterMode.SPONSORED. This indicates to Biconomy that we're covering the cost for the UserOperation:
const paymasterServiceData: SponsorUserOperationDto = {
    mode: PaymasterMode.SPONSORED,
    smartAccountInfo: {
        name: 'BICONOMY',
        version: '2.0.0'
    },
    // Optional params...
};
As mentioned previously, Biconomy offers a Paymaster service that enables developers to use a single URL and switch between SPONSORSHIP Paymaster and Token Paymaster modes. In the SPONSORED mode, users enjoy a gasless experience, while in Token Paymaster mode, users can pay for UserOperations using supported ERC20 tokens.
Now, we are set to execute the UserOperation inside the try block, using an additional try-catch block:
try {
    const paymasterAndDataResponse = await biconomyPaymaster.getPaymasterAndData(
        partialUserOp,
        paymasterServiceData
    );

    partialUserOp.paymasterAndData = paymasterAndDataResponse.paymasterAndData;

    const userOpResponse = await smartAccount.sendUserOp(partialUserOp);
    const transactionDetails = await userOpResponse.wait();

    console.log("Transaction Details:", transactionDetails);
    console.log("Transaction Hash:", userOpResponse.userOpHash);
} catch (e) {
    console.error("Error executing transaction:", e);
}
Next, we have the handleAmount function for setting the amount state:
const handleAmount = (event: React.ChangeEvent<HTMLElement>) => {
    const { value } = event.target as unknown as { value: number };
    setAmount(value);
};
With this first method complete, the next step is to import it into the App.tsx file.
Import in App.tsx
Import the newly created TokenContract component:
import { TokenContract } from "./Components/token";Replace the <div> element that contains the input for Mint Token with the TokenContract component, passing smartAccount and provider as props:
<TokenContract smartAccount={smartAccount} provider={provider} />After saving the file, move the copied <div> into the return statement of the token.tsx file:
<>
  <div className="w-full rounded-md shadow-sm ring-1 ring-inset ring-gray-300 focus-within:ring-2 focus-within:ring-inset focus-within:ring-teal-600 sm:max-w-md">
    <input
      type="text"
      name="amount"
      id="amount"
      autoComplete="amount"
      onChange={handleAmount}
      className="block w-full border-0 bg-transparent py-1.5 pl-1 text-gray-900 placeholder:text-gray-700 focus:ring-0 sm:text-sm sm:leading-6"
      placeholder="$"
    />
  </div><div className="mt-6 gap-x-6">
    <button
      type="submit"
      onClick={mintTokens}
      className="mb-28 rounded-md w-40 bg-teal-600 px-3 py-2 text-sm font-semibold text-white shadow-sm hover:bg-teal-500 focus-visible:outline focus-visible:outline-2 focus-visible:outline-offset-2 focus-visible:outline-teal-600"
    >
      Mint Token
    </button>
  </div>
</>
Save the file.
To mint 1 MTK Token, which has 18 decimal places, enter 1000000000000000000. Click the Mint Token button. You will receive a MetaMask prompt to sign the transaction, instead of a prompt to pay gas fees. Check the console for the transaction success message.
Copy the generated smart contract account and verify it on the Polygon explorer. You have successfully minted 1 MTK Token with zero gas fees!
For those interested in setting up notification alerts, consider using the react-toastify package.
Step 2 - Give Tips
The GiveTips method is not much different from the MintTokens method, except for the fact that it is more interesting! How so? We are going to batch different ABI function calls and send them as one! The function calls are: Approve in the Token Contract and ReceiveTips in the Tipping Contract. Typically with an Externally Owned Account (EOA), one will have to approve a MetaMask prompt for each of these interactions leading to delayed time in UX, and it could also be a steep learning curve for those who are not crypto natives.
Let's begin by creating a file in the components folder named giveTips.tsx.
This file's structure won't differ much from the Token implementation, but it includes the Tipping Contract address and sets calls to it.
First, add the following imports:
import React, { useState } from "react";
import { BiconomySmartAccount } from "@biconomy/account";
import { IHybridPaymaster, SponsorUserOperationDto, PaymasterMode } from '@biconomy/paymaster';
import { ethers } from "ethers";
Define an interface for the component's props:
interface Props {
    smartAccount: BiconomySmartAccount;
}
Declare a function component, passing in the props:
export const GiveTips: React.FC<Props> = ({ smartAccount }) => {
    // Component body will be here
    return ();
}
We will use a single state variable:
const [amount, setAmount] = useState<number>(0);
Next, define both the TokenContractAddress and the TipContractAddress:
const TokenContractAddress = "0x317E4C04C7fDf44fa72bC997AeCe1b691159F95F";
const TipContractAddress = "0x8FA509aB0087755fdd5fb49DF1D5FaD95f9d9eB7";
Now, let's write the giveTips function within a try/catch block:
const giveTips = async () => {
    try {
        // Implementation will go here
    } catch (error) {
        console.log({ error });
    }
};
In the mintTokens method, we utilized ethers.utils.Interface and EncodeDataFunction to parse arguments for partialUserOp. In the Token Smart Contract, the approve method accepts the Tipping Smart Contract Address as spender and specifies the amount to allow the Tipping Smart Contract to spend. This forms the first part of the UserOperation tx1.
const approveTx = new ethers.utils.Interface([
        "function approve(address spender, uint256 amount)",
      ]);

const data = approveTx.encodeFunctionData("approve", [
        TipContractAddress,
        amount,
      ]);

const tx1 = {
        to: TokenContractAddress,
        data: data,
      };
After initializing the approve transaction, we move on to setting up the receiveTips method in the Tipping Smart Contract. This method accepts the MTK amount and transfers it to the Smart Contract. This process forms the second part of the UserOperation (tx2).
const tipTx = new ethers.utils.Interface([
    "function receiveTips(uint256 amount)",
]);

const tipData = tipTx.encodeFunctionData("receiveTips", [amount]);

const tx2 = {
    to: TipContractAddress,
    data: tipData,
};
Both tx1 and tx2 are batched together in an array and passed to the buildUserOp method:
const partialUserOp = await smartAccount.buildUserOp([tx1, tx2]);
Next, initialize the Paymaster as done in the mintTokens method:
const biconomyPaymaster = smartAccount.paymaster as IHybridPaymaster<SponsorUserOperationDto>;

const paymasterServiceData: SponsorUserOperationDto = {
    mode: PaymasterMode.SPONSORED,
    smartAccountInfo: {
        name: "BICONOMY",
        version: "2.0.0",
    },
};
Proceed with the final try/catch block to execute the UserOperation and log the response:
try {
    const paymasterAndDataResponse = await biconomyPaymaster.getPaymasterAndData(
        partialUserOp,
        paymasterServiceData
    );
    partialUserOp.paymasterAndData = paymasterAndDataResponse.paymasterAndData;

    const userOpResponse = await smartAccount.sendUserOp(partialUserOp);
    const transactionDetails = await userOpResponse.wait();

    console.log("Transaction Details:", transactionDetails);
    console.log("Transaction Hash:", userOpResponse.userOpHash);
} catch (e) {
    console.error("Error executing transaction:", e);
}
Implement the handleAmount function to update the amount state:
const handleAmount = (event: React.ChangeEvent<HTMLElement>) => {
    const { value } = event.target as unknown as { value: number };
    setAmount(value);
};
With the completion of the GiveTips component, the next step involves integrating it into the App.tsx file.
Integration in App.tsx
Now, we will import and integrate the GiveTips component into the App.tsx file. This enables the application to utilize the tipping functionality in its UI!
import { GiveTips } from "./Components/GiveTips";Replace the <div> element that contains the Input and Button for the Give Token action with the GiveTips component. Ensure to pass the smartAccount prop to it:
<GiveTips smartAccount={smartAccount} />After updating App.tsx, save the file.
Modifying the Token.tsx File
Paste the previously used <div> for input and button in the return statement of the token.tsx file:
<>
  <div className="w-full rounded-md shadow-sm ring-1 ring-inset ring-gray-300 focus-within:ring-2 focus-within:ring-inset focus-within:ring-teal-600 sm:max-w-md">
    <input
      type="text"
      name="amount"
      id="amount"
      autoComplete="amount"
      onChange={handleAmount}
      className="block w-full border-0 bg-transparent py-1.5 pl-1 text-gray-900 placeholder:text-gray-700 focus:ring-0 sm:text-sm sm:leading-6"
      placeholder="$"
    />
  </div>
  <div className="mt-6 gap-x-6">
    <button
      type="submit"
      onClick={giveTips}
      className="mb-28 rounded-md w-40 bg-teal-600 px-3 py-2 text-sm font-semibold text-white shadow-sm hover:bg-teal-500 focus-visible:outline focus-visible:outline-2 focus-visible:outline-offset-2 focus-visible:outline-teal-600"
    >
      Give Tips
    </button>
  </div>
</>
Execution
To tip 0.1 MTK, enter 100000000000000000 (i.e., 17 zeros following the 1) in the input field. This represents the amount with 18 decimal places. Click the Give Tip button, and a MetaMask prompt should appear, requesting you to sign the transaction, rather than paying gas fees. See the console for the Transaction success message!
Check the Tipping Smart Contract on Polygon explorer. You have Tipped 0.1 MKT Token! You carried out a batched blockchain transaction with zero gas fees!
Conclusion
In this guide, we've taken a deep dive into making web3 apps more user-friendly with the help of something called a Paymaster, working alongside the Biconomy SDK. This combo is a game-changer, making it way easier for people to get into the web3 world without stumbling over complex stuff like gas fees.
We walked through setting up a Tipping Smart Contract. This cool tool lets users tip creators without worrying about those pesky gas fees. The Paymaster Contract, mixed with the Biconomy SDK, does all the heavy lifting in the background, so users get a smooth and enjoyable experience.
Our main goal was to show you how to create a user interface (UI) that interacts easily with both a Token Smart Contract and a Tipping Smart Contract. We focused on Smart Contract Accounts to make it simpler for users to interact with the app. They don't need a special account (EOA) anymore; they can just use different ways to sign in. We highlighted how to handle single and batch operations, giving developers a solid foundation to build more complex stuff like doing several operations in one go.
Although we didn't go into every detail, like how to display transaction loading states, we suggested using the react-toastify library. This adds neat notifications to the app, making it look and feel better.
All the Smart Contracts we talked about are up and running, and you can check them out on the Polygon Mumbai Explorer. You can also see the whole setup and all the code on GitHub.
To sum it up, making web3 apps easier to use is super important, especially for bringing in new people. Paymasters play a big role in this by taking away the hassle of gas fees. This guide is just the beginning. It opens the door to a future where everyone can join in on things like digital finance, creating cool content, and socializing in the web3 space, all without getting bogged down by technical stuff. It's an exciting step towards a more accessible and enjoyable digital world for everyone!