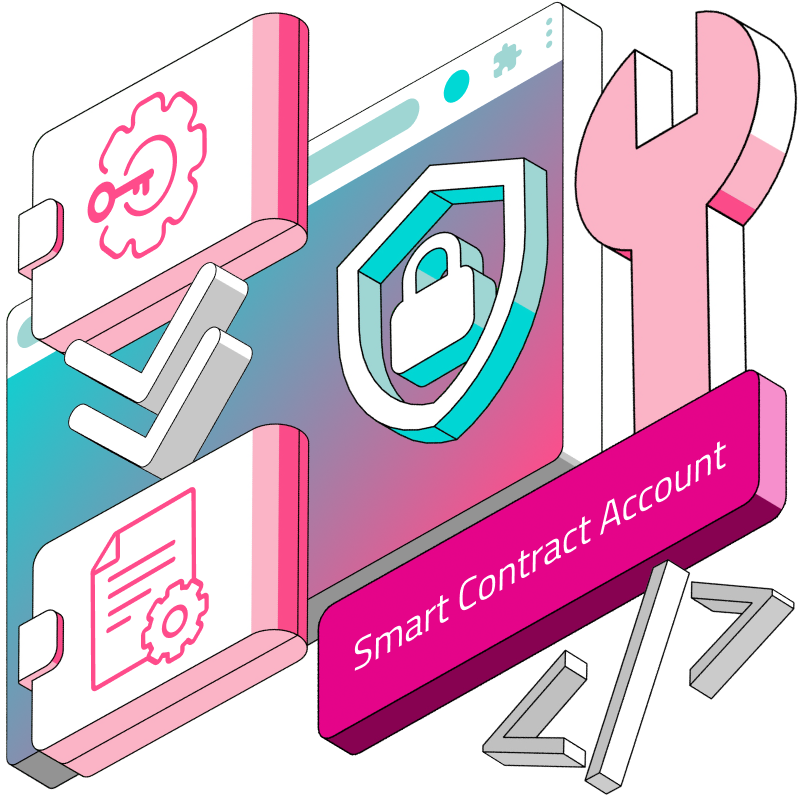
Building with Account Abstraction (Part 1) - Creating Smart Contract Accounts
Learning about Account Abstraction (AA) presents a steep learning curve for developers who want to understand the relationship between wallet addresses and the way transactions function in the new paradigm. This confusion is mostly due to the fact that Account Abstraction was not proposed as a Protocol Level change to Ethereum; rather, it is a proposal that relies on an Alternative Mempool to bundle UserOperations, i.e. UserOp (replacing transactions) into a bundler, which then receives all the UserOperations via an EntryPoint Smart Contract, and adds it to a block.
To simplify, consider these key points:
UserOperations replace transactions.
The
senderfield in a UserOp is a Smart Contract Account (SCA) and not an Externally Owned Account (EOA).The
senderis created from a Smart Contract using a mix of ECDSA and algorithms.
In this guide, we will walk through how the sender field in a userOp is created as a Smart Contract Account in Account Abstraction. To get the best out of this article, I recommend reading the ERC 4337 and the section on First Time Account Creation. In this article, we will explore common SDKs that developers can use to create a Smart Contracts Account using code walkthroughs. At the end of this article, you will learn enough to understand how Smart Contracts Accounts, which are represented as the sender field in UserOp, are created.
Prerequisites
Read the ERC 4337 proposal.
Basic familiarity with the concept of Account Abstraction. You can read the Covalent Guide on Account Abstraction.
An Understanding of what Node Operators do.
NodeJS is installed on your machine. v18+ recommended.
An IDE, e.g. VSCode.
I will provide a little background on some concepts, which will form blocks (pun intended) that link together in understanding the primary difference between EOAs and SCAs, how they are each created, and the importance of the sender field in userOps.
Who/What is a User in Ethereum?
In Ethereum, activities are primarily divided into READ and WRITE operations. Users can perform READ operations to access data from the blockchain, whether it's their own data or data owned by others. Conversely, WRITE operations allow users to submit or 'POST' their own data to the blockchain. These activities ensure that data ownership, which is the premise of Blockchain technology, is achieved. To identify ownership on-chain, every user is associated with a unique Ethereum ACCOUNT.
To contextualize, think of Ethereum accounts as email addresses. The email (Public Address) can be shared, but only you, with the right password (Private Key), can access its contents. Famously put as, "Not your keys? Not your wallet!" So, you need an ACCOUNT to interact with the Ethereum blockchain.
But how do you get this account? Two primary ways:
Wallet Services: Think of these as Gmail provided by Google. It's a platform where you can access your email (account). Examples in Ethereum are MetaMask or Trust Wallet. They give you a Key Phrase to prove ownership, but if you lose it, access is gone forever. Such services are "Non-Custodial,” meaning they don't own your data or assets.
Create Your Own: Some users prefer a more hands-on approach. They directly create their account, maintaining all keys. This is also deemed "Non-Custodial,” signifying total ownership.
How Wallet Addresses (EOA) are Generated in Web3:
We can use the Go-Ethereum Library Geth to generate an Ethereum Address. Geth provides us with a module clef that is used for account management. It goes without saying that you need to be running a client node to access this feature.
Given the complexities of running an Ethereum node, other options for generating an Ethereum Address include using Ethereum Libraries Web3.js or Ethers.js.
Web3.js
Web3.js contains the web3.eth.accounts method, which contains functions to generate Ethereum accounts and sign transactions and data.
Running this script in a NodeJS app:

const web3 = require('web3');

const account = web3.eth.accounts.create();

console.log(account);
Will log the following response to the console:
{
  address: '0xA588CE075A5ab367245c508FEDcAe799BDa80Fa1',
  privateKey: '0x-yourPrivateKeyString',
  signTransaction: [Function: signTransaction],
  sign: [Function: sign],
  encrypt: [Function: encrypt]
}
Ethers.js
To create an Account in Ethers.js, run this script:
var ethers = require('ethers');
var crypto = require('crypto');

var id = crypto.randomBytes(32).toString('hex');
var privateKey = "0x" + id;

console.log("SAVE BUT DO NOT SHARE THIS:", privateKey);

var wallet = new ethers.Wallet(privateKey);
console.log("Address: " + wallet.address);
The crypto module, which comes with NodeJS, provides cryptographic functionality that includes a set of wrappers for OpenSSL's hash, HMAC, cipher, decipher, sign, and verify functions.
The result is logged to the console:
SAVE BUT DO NOT SHARE THIS: 0xyourPrivateKeyString
Address: 0xd9e3bB87e6c77edC675D955718A6fE90c9d55815
You can take the Private Key, import it into your MetaMask Wallet Address and test it!
It is relevant to understand that generating an Ethereum address happens off-chain through a mix of ECDSA and Keccak256. Here's an example of the steps:
A random private key of 64 (hex) characters (256 bits / 32 bytes) is generated first, like:
0xf4a2b939592564feb35ab10a8e04f6f2fe0943579fb3c9c33505298978b74893
A 128 (hex) character (64 bytes) public key is then derived from the generated private key using the Elliptic Curve Digital Signature Algorithm (ECDSA):
0x04345f1a86ebf24a6dbeff80f6a2a574d46efaa3ad3988de94aa68b695f09db9ddca37439f99548da0a1fe4acf4721a945a599a5d789c18a06b20349e803fdbbe3
The Keccak-256 hash function is then applied to the 128 characters (64 bytes) public key to obtain a 64-character (32 bytes) hash string. The last 40 characters (20 bytes) of this string prefixed with
0xbecome the final Ethereum address, e.g.:
0xd5e099c71b797516c10ed0f0d895f429c2781142
Now that we understand what happens during EOA creation, we can differentiate between EOAs and SCAs. To understand SCAs, we have to take a cursory look at UserOp which contains the sender: an account created by a Smart Contract for our use. Next, we'll cover creating a Smart Contract Account with Account Abstraction.
How Accounts are Created with Account Abstraction
As outlined at the beginning of this article, you should be familiar with the ERC 4337 specification before proceeding.. This section will focus on First Time Account Creation
The goal of Account Abstraction is to create an account for any user who hasn’t had one before, enabling them to use the blockchain. For an EOA, offline algorithms generate a Private Key with an Associated Public address. For an SCA, a Factory Contract creates a “deterministic address”. This means we can determine the public address from the algorithm before deploying it on-chain. As stated, a Factory Contract performs the Account creation. It uses the Ethereum OpCode CREATE2 (not CREATE) to ensure that the order of creation of Accounts doesn’t interfere with the generated addresses. A Factory Contract should create an address using:
The address of the contract calling CREATE2
A PrivateKey (any 32-byte value)
The init code of the contract being deployed
Before continuing, let's introduce the initCode. This UserOp property verifies if an SCA exists for a Smart Contract in a UserOp. Here is a reminder of the fields of the UserOp, with a focus on the initCode and sender fields.
InitCode
When a UserOp is sent on-chain by a Smart Contract, the sender field is not yet present and is created by initCode. A Factory Contract is used to create the Account from the initCode operation. According to the ERC 4337 Standard, there is an available RPC method for sending the UserOperation. The method call is eth_sendUserOperation. Calls made to the eth_sendUserOperation method go to the EntryPoint Contract, where a UserOp is first validated before subsequent execution. In the validation process, a call to the Factory Contract by the initCode takes place, generating an SCA if it hasn't been made previously. This SCA can be accessed in the EntryPoint Contract by invoking entryPoint.getSenderAddress(), wherein the EntryPoint Contract manages calls to the Factory Contract.
In a sequential order:
When a UserOp is deployed to an EntryPoint contract using the
eth_sendUserOperationlike so:
{
  "jsonrpc": "2.0",
  "id": 1,
  "method": "eth_sendUserOperation",
  "params": [
    {
      "sender": "sender_value",
      "initCode": "initCode_value",
      ...
    },
    "entryPoint"
  ]
}
If the call is being made for the first time, the already deployed factory contract invokes the initCode, which specifies the CREATE2 OpCode, returning an account, the sender address. An example of such an implementation might follow this pattern:
contract Factory {
    function deployContract(bytes data) public returns (address);
}
The
entryPoint.getSenderAddress()method call will then return the generated address. You can find an example implementation of a Factory Smart Contract by Infinitism here.
The Infinitism SimpleAccountFactory.sol Smart Contract was conceived as a demonstration Smart Contract that supports the Smart Contract Account creation feature of ERC 4337. A number of SDKs are available for developers who want to implement Account Abstraction in their dApps without the need to deploy their own Factory Smart Contracts for Account creation. We'll explore a few SDKs and delve into the creation of Account addresses using each.
A critical learning aspect for developers in grasping SCAs is that an SCA can be created away from a UserOp.
Creating Smart Contract Accounts (SCA) using Developer SDKs
Currently, in the Ethereum Ecosystem, there are SDKs provided by StackUp, Biconomy and Alchemy. In this section, we will focus on the StackUp and Biconomy SDKs, as those are already being used in production. Keep in mind that our primary focus here is on creating Smart Contract Accounts, it is not on the EntryPoint, Bundler or PayMaster Contracts. StackUp and Biconomy are Node Operators who provide services to developers who want to build on Blockchains.
StackUp
StackUp provides a range of Account Abstraction services to developers via their SDK and a Javascript Library that enables ERC 4337 UserOp called userop.js.
We will create a Smart Contract Account using the Ethers.js and UserOp.js libraries. Here’s how:
Step 1: Setting Up Your Development Environment
Open VSCode or any IDE of your choice. Create a folder and change the directory into the folder:
$ mkdir stackup-sh-aa && cd stackup-sh-aa
Step 2: Initializing the Project
Initialize a new npm project, creating a package.json file for dependencies:
$ npm init -y
Step 3: Installing Libraries
Download the relevant libraries:
$ npm install [email protected] useropjs
Step 4: Configuring TypeScript
Install Typescript and ts-node as developer dependencies:
$ npm i -D typescript ts-node
Create a Typescript configuration file:
./node_modules/.bin/tsc --init
After running the command, you'll get a message indicating the successful creation of tsconfig.json. Open the ts-config.json file and uncomment the line "resolveJsonModule": true. This will enable us to import JSON files to read from.
Step 5: Writing the Initial Script
Create an index.ts file and add the following code:
import { ethers } from "ethers";
import { Presets } from "userop";

export default async function main() {
    const simpleAccount = await Presets.Builder.SimpleAccount.init(
        new ethers.Wallet(<Signing_Key>),
        <RPC_Url>
    );
    const address = simpleAccount.getSender();
    console.log(`SimpleAccount address: ${address}`);
}
This script relies on the Ethers.js Library Wallet method call that enables us to create a non-custodial wallet from a PrivateKey string. Recall that creating an SCA requires a PrivateKey string that the owner of the SCA can use to prove ownership of the SCA.
StackUp encapsulates a call to the InitCode via the init method call and, using the PrivateKey string creates the SCA and propagates it on-chain via the Node URL. The address is generated here and can thus be used in a UserOp subsequently via another SDK call for creating a UserOp.
You will see that we need two things for our code: a Signing_Key, which is a private key string for creating our Smart Contract Account, and an RPC_Url to be provided by a node provider. In this instance, StackUp also serves as a node provider, and we will secure an RPC URL from them.
Step 6: Preparing Configuration File
Create a config.json file to store the necessary credentials. Create a placeholder for the keys:
{
    "RPC_Url": "...",
    "Signing_Key": ""
}
Step 7: Generating a Private Key
To generate a PrivateKey, which is any random 32-byte string preceded by “0x” using ethers.utils.randomBytes(32), we’ll use a script via a method provided to us by Ethers.js and log it to the console. After it has been generated, we will copy it and comment out the line of code from the script.
Add these two lines to the bottom of the code:
const randomPrivateKey = ethers.Wallet.createRandom().privateKey;
console.log(`Random Private Key: ${randomPrivateKey}`);
It is a const where we store a random key that is generated by calling the ethers.Wallet.createRandom().privateKey method, and then we log it to the console.
After generating the key, copy it into the "Signing_Key" field in the config.json file. With this PrivateKey, we can proceed to generate an SCA.
Step 8: Acquiring StackUp Node RPC URL
Visit the StackUp account by visiting https://app.stackup.sh/sign-in.

Log in to go to your Dashboard. Create a New Instance and set it to Polygon Mumbai Testnet:

Copy the RPC URL by clicking on the Node button:

Update your config.json file with the copied RPC URL.
Now, we are ready to generate a smart contract address!
Step 9: Integrating Config into Script
Update the index.ts file by importing the config path into the index.ts file, and update the two paths to point to the correct Signing_Key and RPC_URL:
import config from "./config.json";

// Later in the code...
const simpleAccount = await Presets.Builder.SimpleAccount.init(
    new ethers.Wallet(config.Signing_Key),
    config.RPC_Url
);
Step 10: Running the Script
Add the following script to your package.json file:
"scripts": {
    "start": "node --loader ts-node/esm index.ts"
}
Comment out or remove the line in index.ts that creates a new PrivateKey using ethers.Wallet and update the file to enable main() to be called as a method by adding main() to the bottom of the file.
Run the script to generate the SCA:
$ npm start
There! Look at the Console! You have generated a SCA! This SCA can be used to communicate with any StackUp EntryPoint Contract as the sender field in a UserOp. Copy the address from the console and paste it into the Mumbai Explorer. You will see that the address exists!
Biconomy
The Biconomy Modular SDK is a package for common Account Abstraction use cases. The SDK operates in a non-custodial manner, thereby giving developers flexibility over their implementation.
To create an SCA using the Biconomy SDK, follow these steps:
Step 1: Setting Up the Workspace
Open VSCode or any IDE of your choice. Create a folder and change the directory into the folder:
$ mkdir biconomy-aa && cd biconomy-aa
Initialize a new npm project, creating a package.json file for dependencies:
$ npm init -y
Step 2: Installing Dependencies
Install necessary dependencies:
$ npm install [email protected] @biconomy/account @biconomy/common @biconomy/paymaster
Install typescript and ts-node as developer dependencies:
$ npm i -D typescript ts-node
Step 3: Configuring Typescript
Create a ts-config.json file:
./node_modules/.bin/tsc --init
A success message is shown in the terminal:
Created a new tsconfig.json with
Update the generated ts-config.json file. Find and uncomment:
"resolveJsonModule": true
This will enable us to import JSON files.
Step 4: Coding the Implementation
Create an index.ts file and add the following code:
import { ethers } from "ethers";
import { ChainId } from "@biconomy/core-types";
import {
    BiconomySmartAccount,
    BiconomySmartAccountConfig,
} from "@biconomy/account";

import config from "./config.json" assert { type: "json" };

const { signingKey } = config;

const biconomySmartAccountConfig: BiconomySmartAccountConfig = {
    signer: new ethers.Wallet(signingKey),
    chainId: ChainId.POLYGON_MUMBAI,
};

const biconomyAccount = new BiconomySmartAccount(biconomySmartAccountConfig);
const biconomySmartAccount = await biconomyAccount.init();
const smartAccountInfo = await biconomySmartAccount.getSmartAccountAddress();

console.log(`Smart Account address: ${smartAccountInfo}`);If you look closely, at this point, you will notice the use of the Ethers.js Wallet method for creating a wallet from a PrivateKey string. Again, this key is used in the SCA creation process in Biconomy.
Add the following script to your package.json file:
"scripts": {
    "start": "node --loader ts-node/esm index.ts"
}
If you are feeling particularly curious, you may also log the response in the biconomySmartAccount to the console:
console.log( biconomySmartAccount);
Step 5: Generating the Smart Contract Address (SCA)
Run your script:
$ npm start
There! Look at the Console! You have generated an SCA. Copy the address from the console and paste it into the Mumbai Explorer. You will see that the address exists! This SCA can be funded, and you can start using it to carry in UserOperations as the sender field value!
Conclusion
Current documentation doesn't distinguish between Smart Contract Account (SCA) creation and UserOperations. It's absent from the Proposal because SCAs' first-time creation occurs during the validation phase bundled under the eth_sendUserOperation RPC method. This means many developers remain unaware that SCAs can be pre-created before sending a UserOp using the InitCode, based on the Create2 Opcode.
To reiterate, an SCA is essentially created using a Factory Contract, implemented with Create2 opcode. The basic requirements are a PrivateKey (a 32-byte value) and the initCode of the deploying contract. This method is evident in the SDKs we explored: StackUp GitHub & Biconomy GitHub.
The key takeaways here from learning the importance of creating an SCA outside of a bundled UserOp are:
Developers have a choice of creating an SCA for their users and funding the SCA with tokens that can then be used to pay gas for their UserOperations in the instance where developers do not want to handle gas payment using a Paymaster Contract.
This gives developers an option to build wallet systems that are non-custodial in nature, given that the owner of an SCA has access to the Primary Key for creating the SCA and, thus, still possesses ownership like in the EOA kind of behavior.
Developers are able to build Social Login experiences for users who aren’t either aware of custodianship in Web3 or who simply want to use a dAPP with just their email addresses. This is how Social recovery is thus enabled using Account Abstraction
Understanding how SCAs are created away from a UserOp lays a foundation for developers to learn how to create bundled “transactions,” such as calling approve and transfer in one UserOp
Congratulations on making it to the end of this article, I hope you have learned a whole lot from reading this. I enjoyed writing this and also learned a whole lot in the process.